WINDOWS – Server 2012
To install the Windows Server 2012 operating system on your vServer, follow these steps:
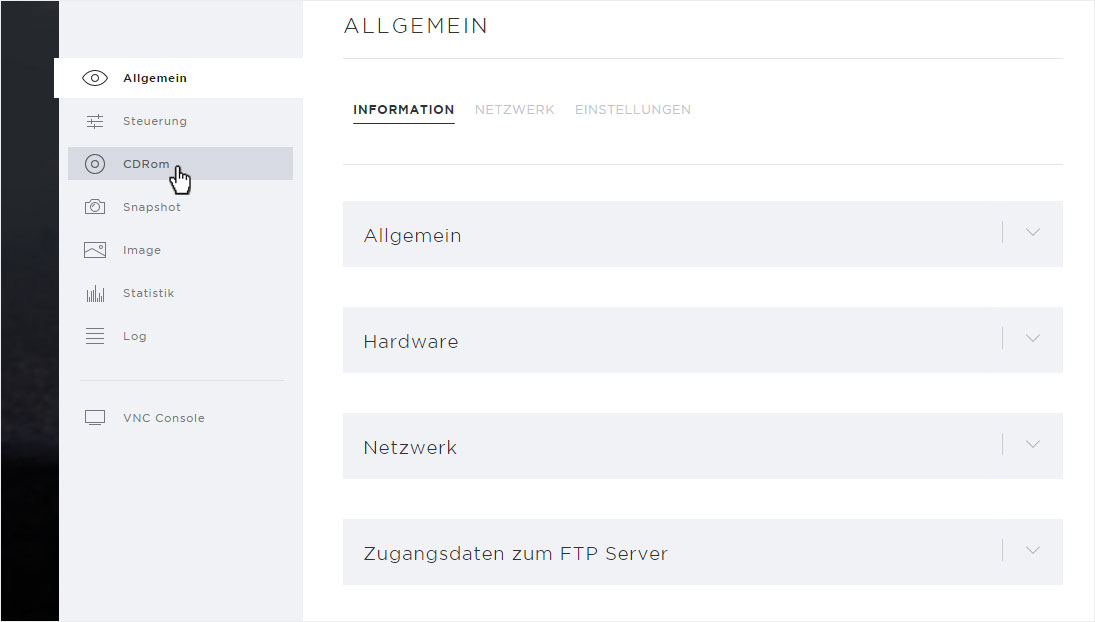
2. Navigate
After logging in, the «General» overview page appears.
At the left, select «CD-ROM» from the menu.
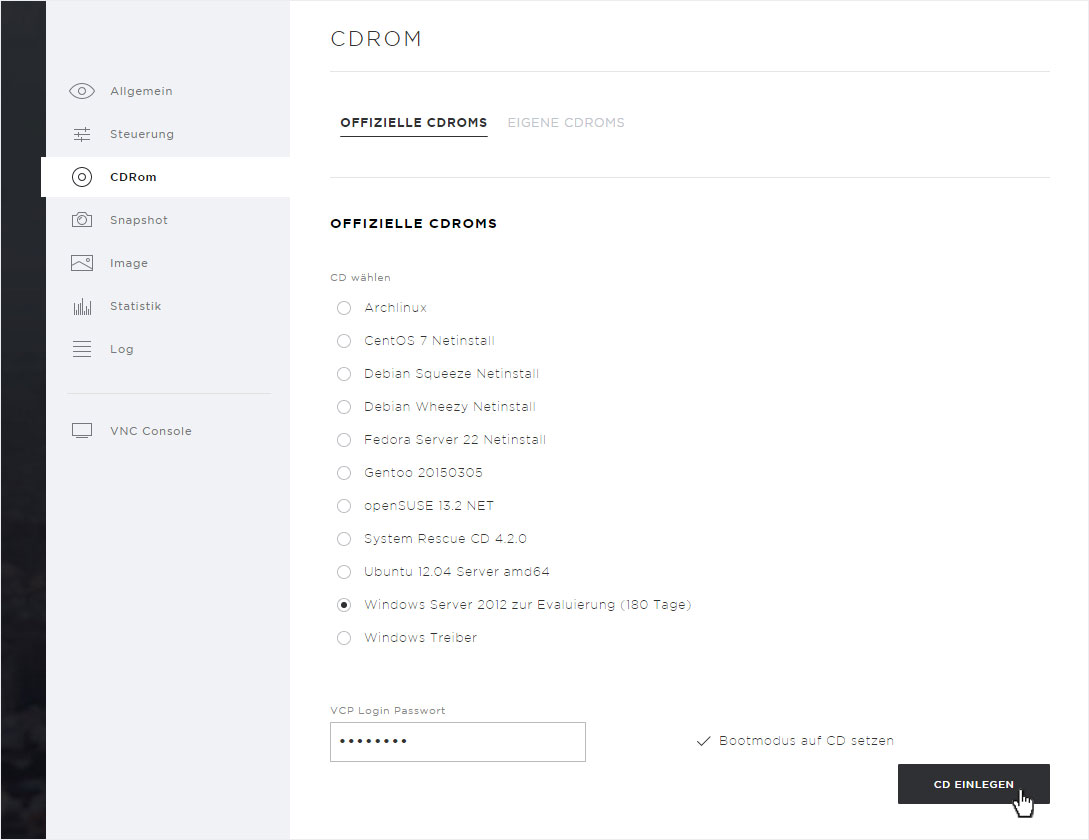
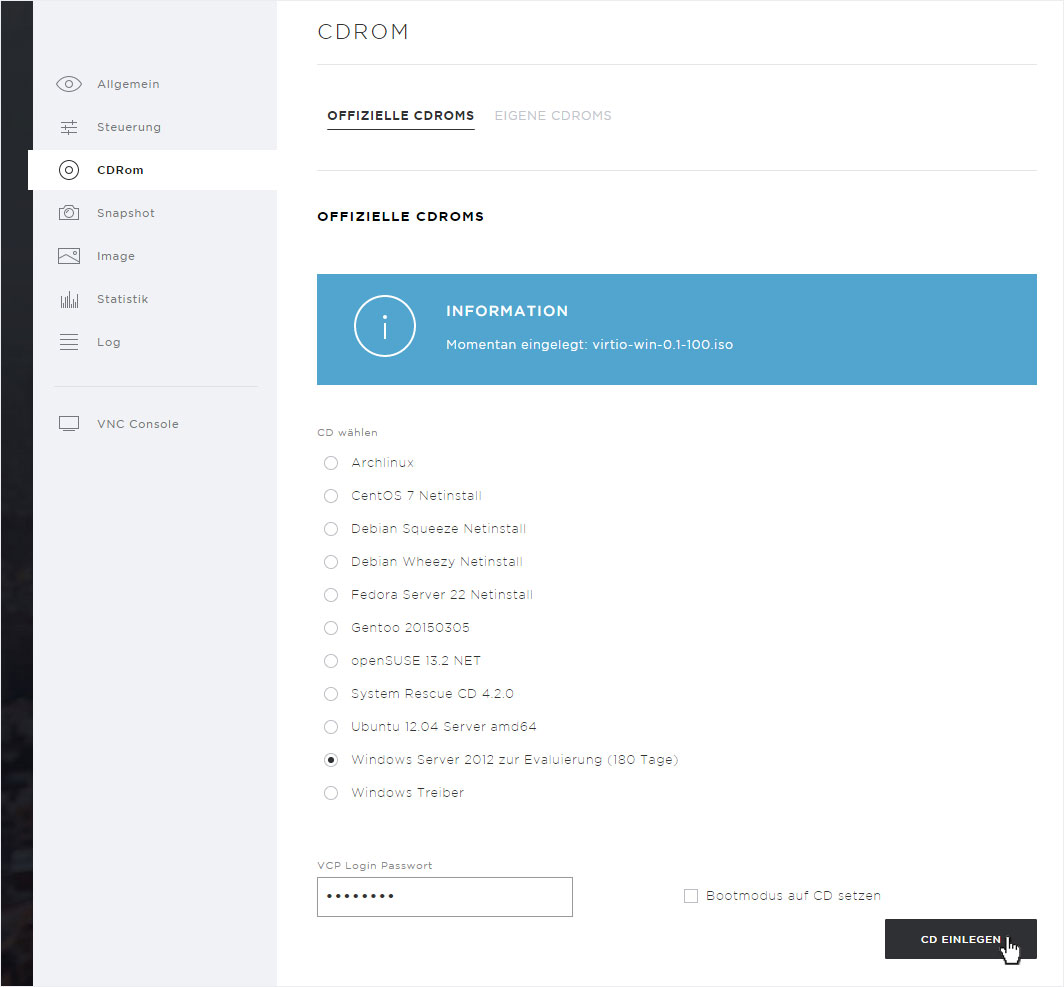
3. Selection
Select «Windows Server 2012» from the list of operating systems that can be installed directly. Under «VCP login password», enter your password (the same as for the login into Hoststar vServer Panel) and tick the box «Set boot mode to CD».
Now click «Insert CD».
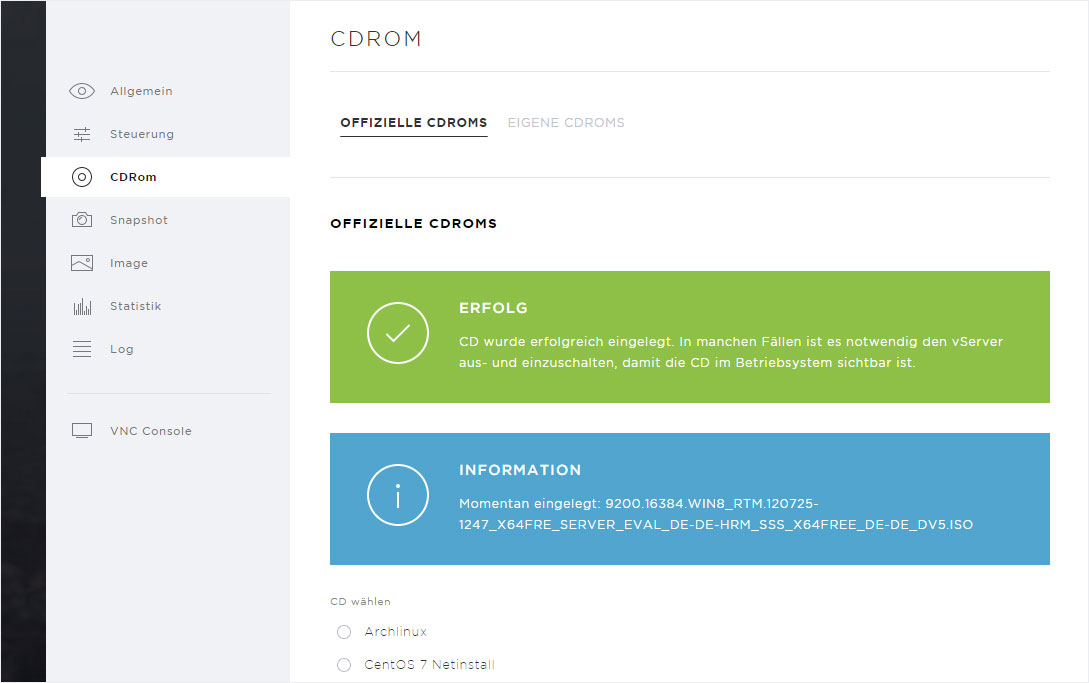
4. Success message
After you have inserted the CD-ROM, you will see a success message along with an info message.
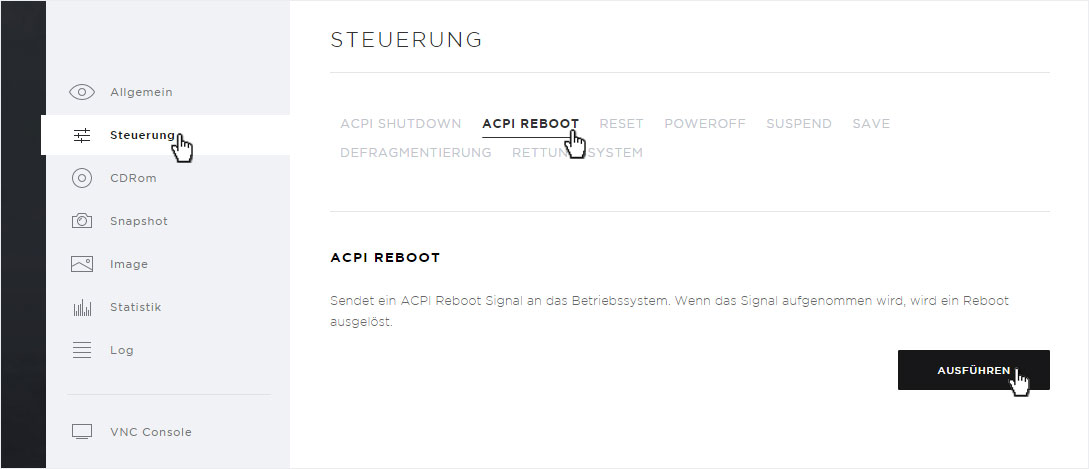
5. Controller
In the menu to the left, now click «Controller». Now select «ACPI Reboot» at the top of the overview page that appears and then click «Execute».
6. VNC Console
Now select «VNC Console» from the menu at the left.

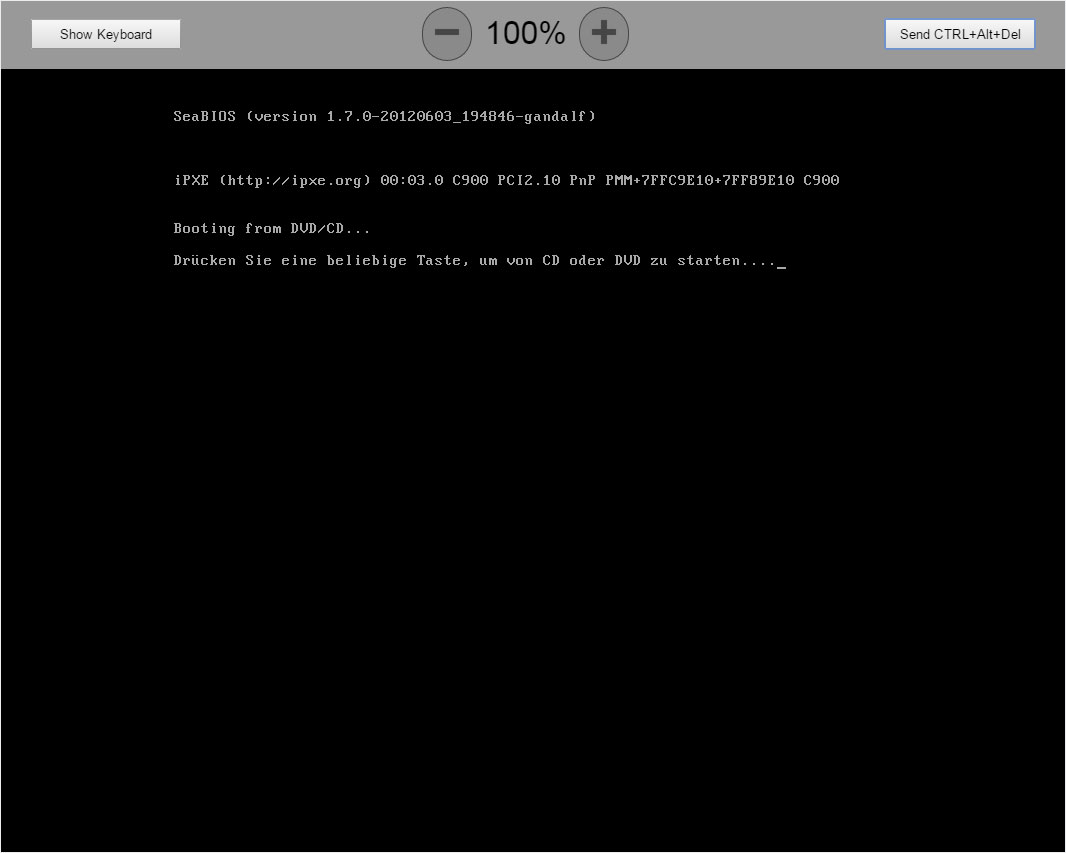
7. Boot method
A window appears. The «VNC Console» appears. You should now see the boot method.
You will then be prompted to press any key to continue.
8. Load files
The files are loaded. This can take a few minutes. The progress of the loading operation is displayed.

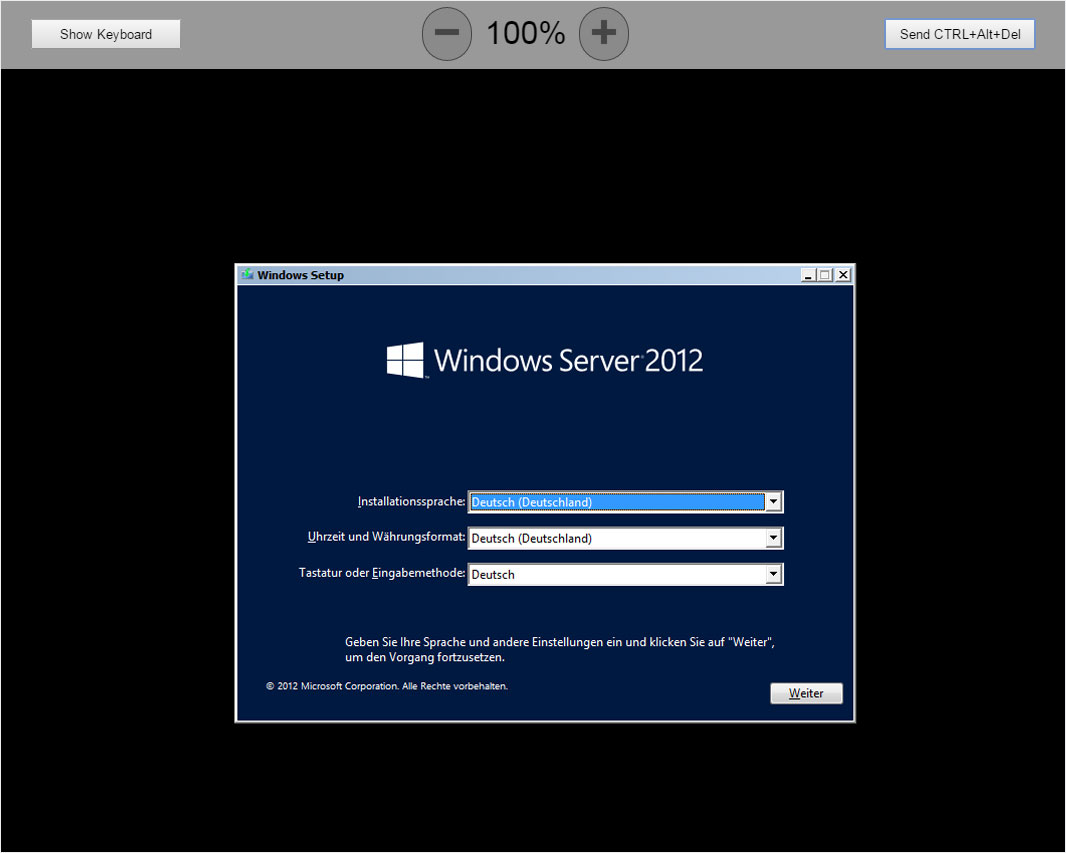
9. Settings
A dialogue box in which you can configure the language and keyboard settings now appears. After you have selected the language and configured the other settings, click «Next».
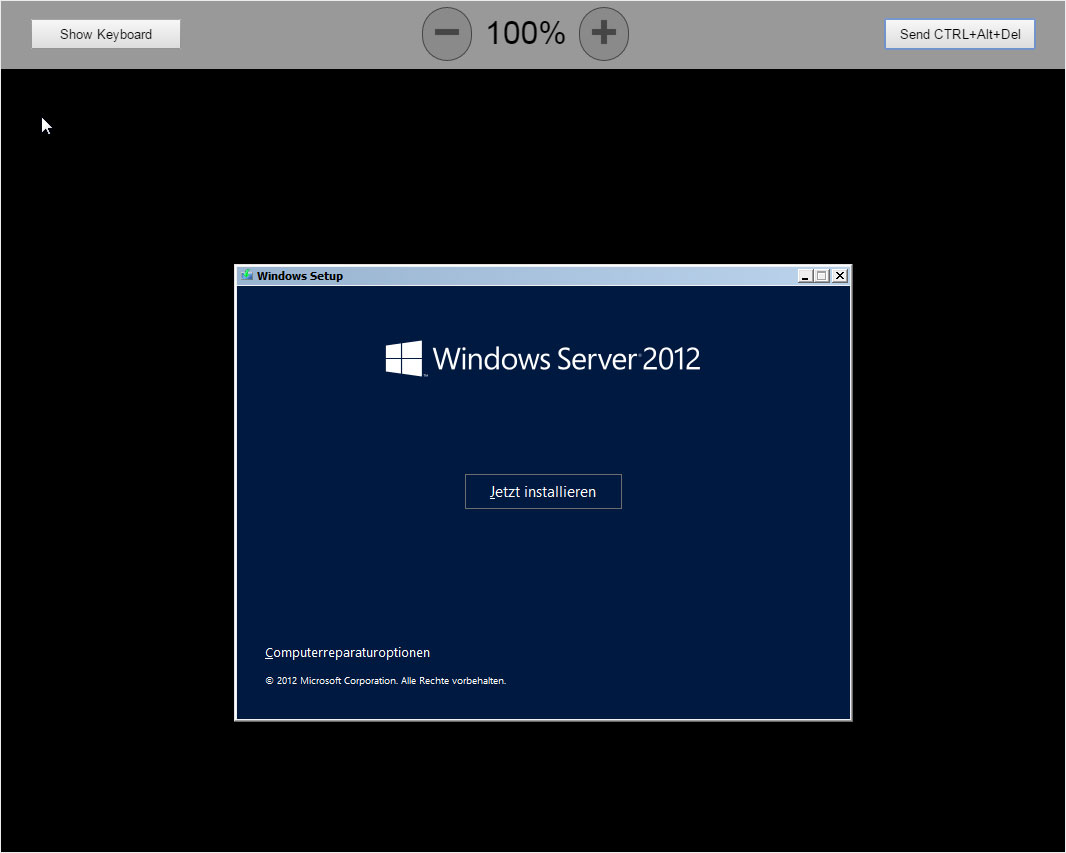
10. Start installation
Click «Install now» in the dialogue that appears to install «Windows Server 2012». The setup process begins.
11. Operating system
Select the operating system you want to install. Please note that you can choose operating systems with or without a graphical user interface.
Select the operating system you plan to purchase no later than the day on which the test license expires. The test license is valid for 180 days.

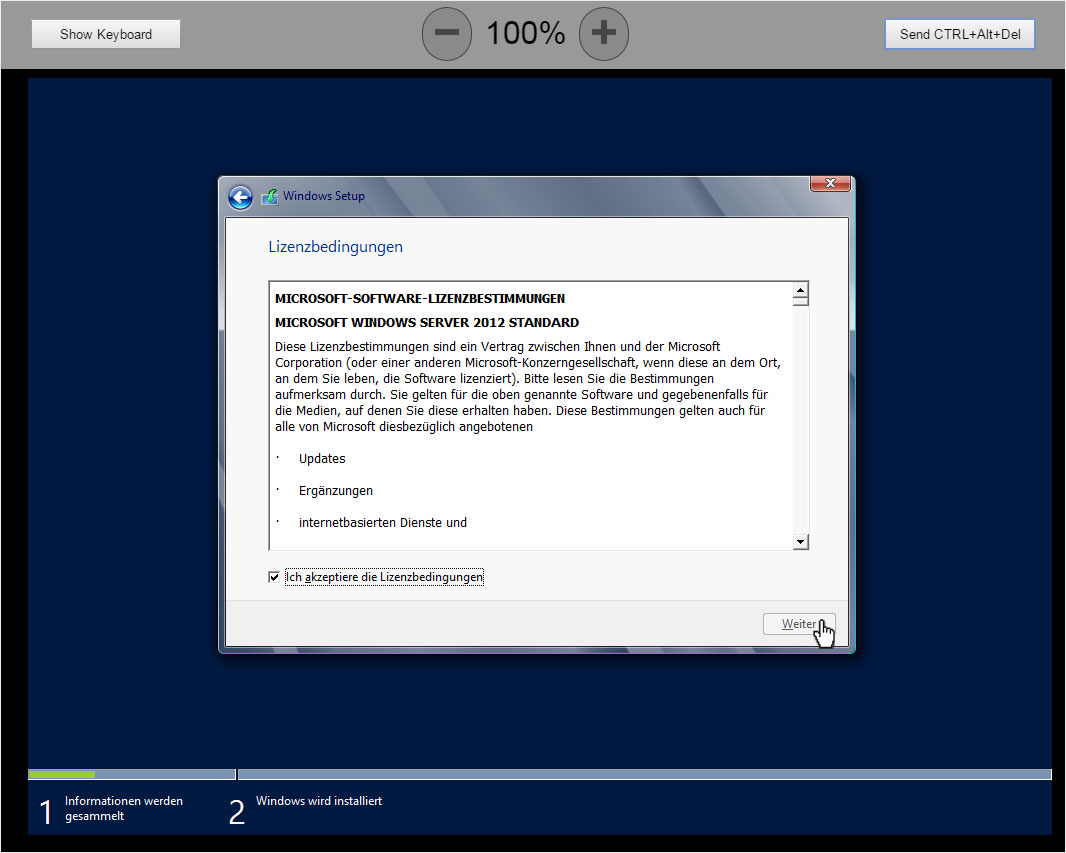
12. License terms
Tick the box «I agree to the licensing terms» and then click «Continue» to proceed with the installation.
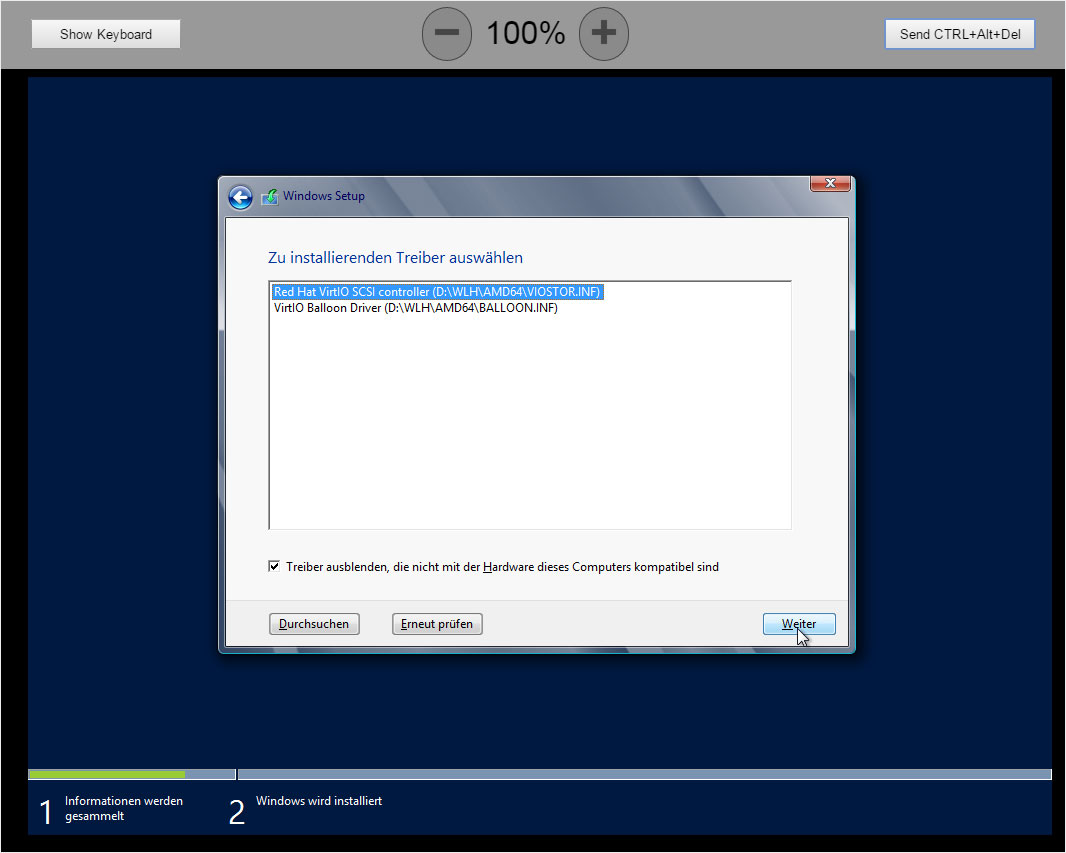
13. Drivers
You will now see a dialogue box that lets you search for and select drivers. Before you click «Browse», ...
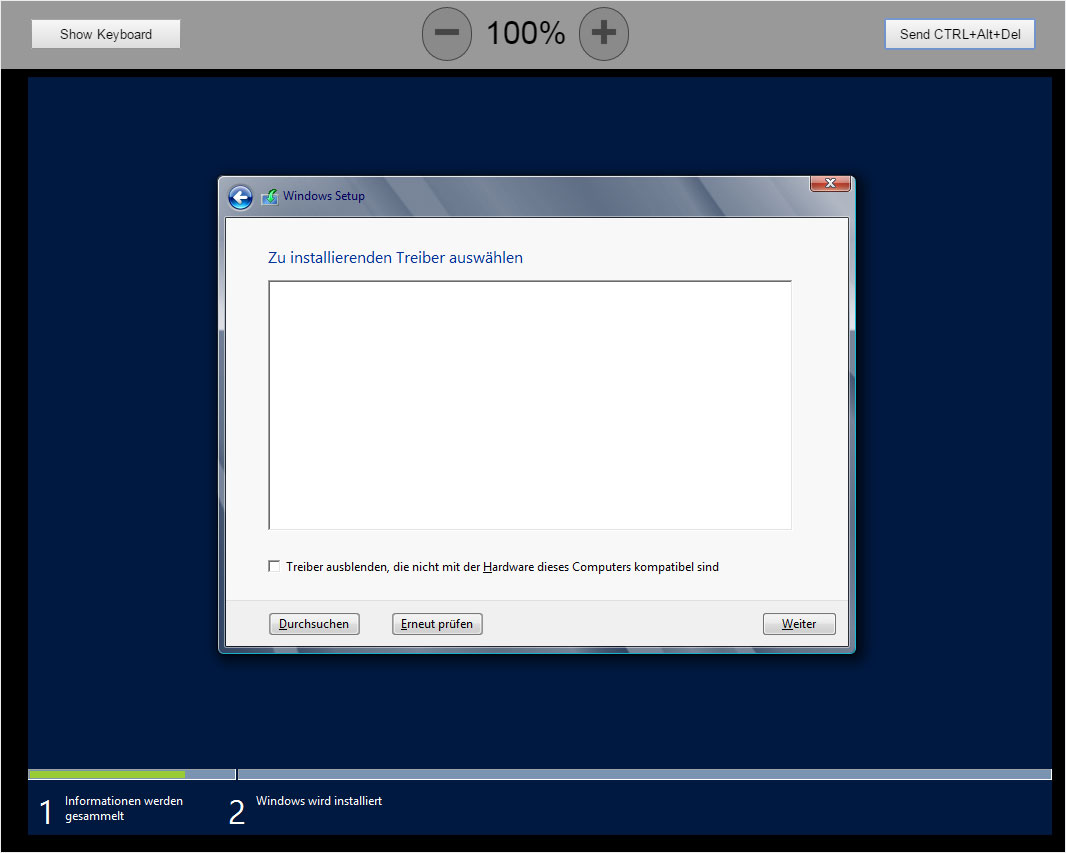
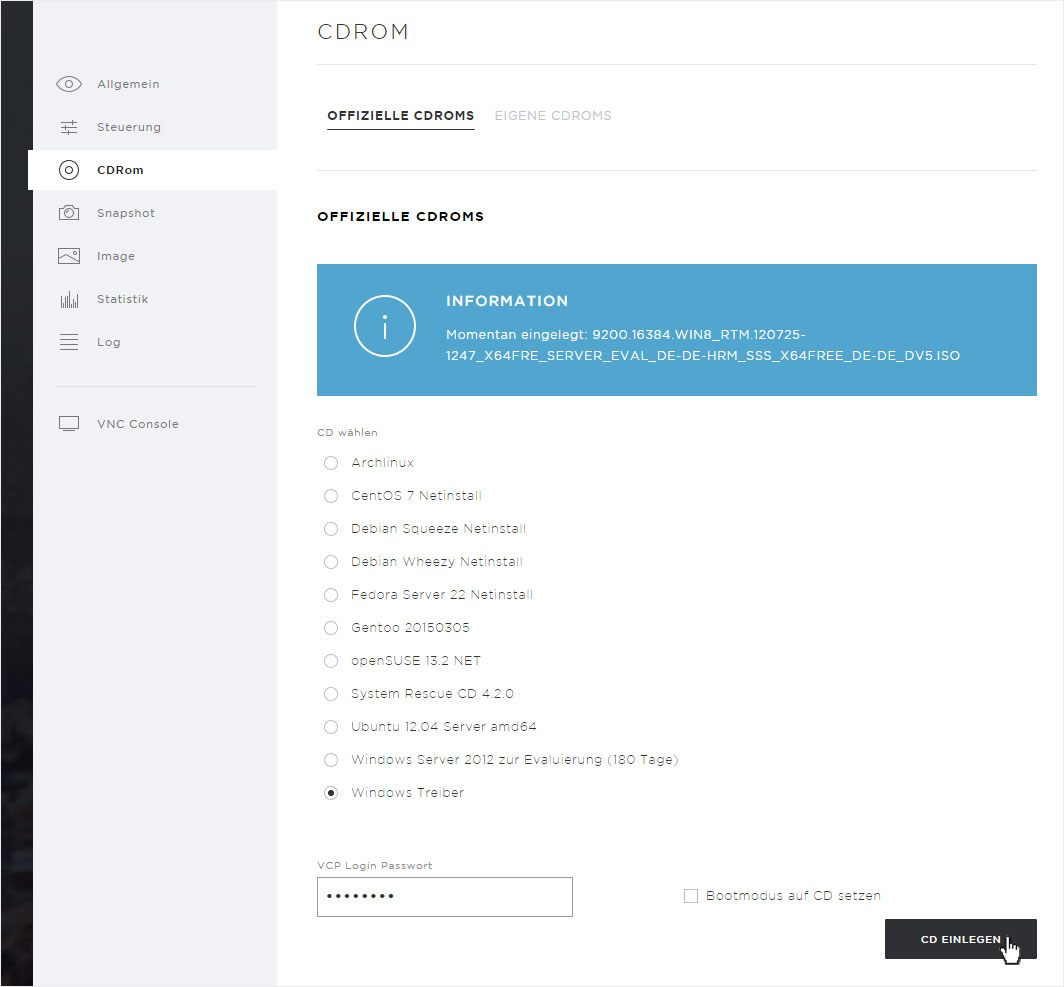
... you must go to the «vServer Panel» and select «Windows drivers» under «CD-ROM» and enter the «VCP login password».
Then click «Insert CD». A new CD-ROM is inserted, and you see a success message and info notification.
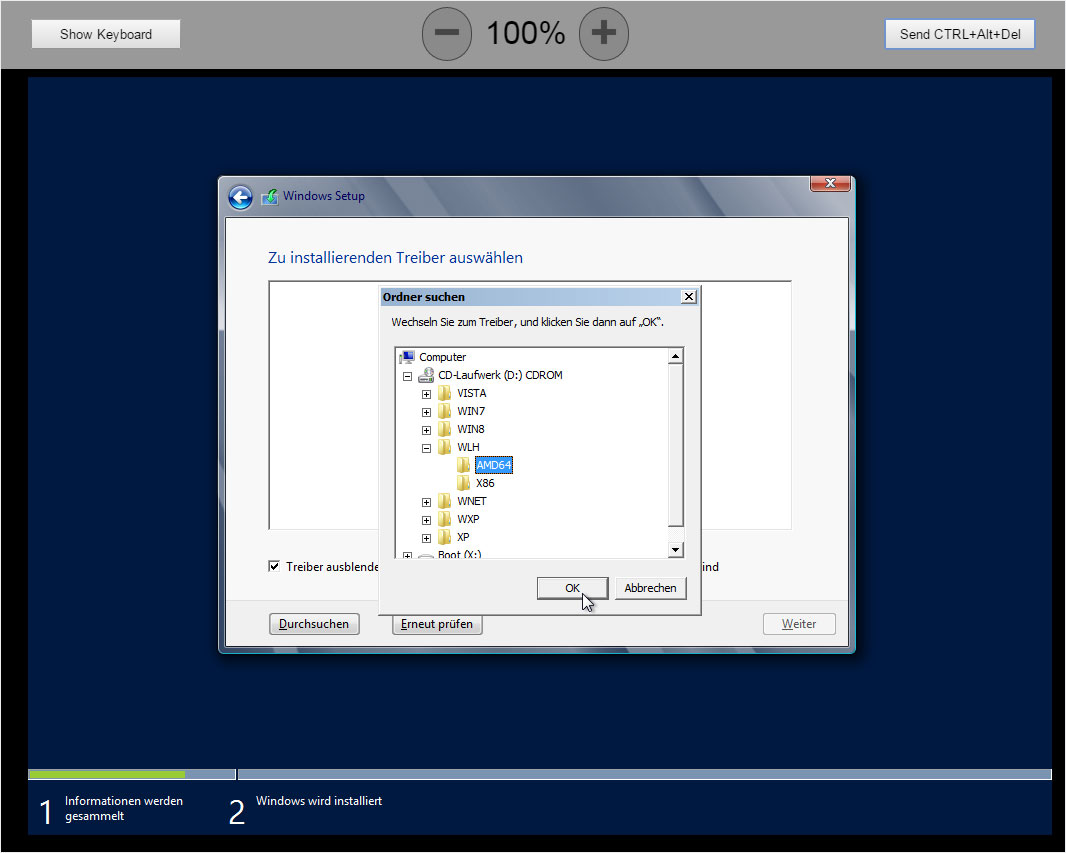
14. Browse
Return to the «VNC Console». Now click «Browse» to select the driver you want to install. The driver required for the installation is located under «CD drive → WLH → AMD64».
After you have made your selection, click «OK».
Now select the driver «Red Hat VirtlO SCSI controller» and click «Next».
15. Partition
In the next installation step, you will be prompted to select a location for your Windows installation. Create a partition for this by clicking «New», select the size and then save these settings.
Before you click «Next», ...

... you must first re-insert the «Windows Server 2012» CD. Return to the «vServer Panel» and select the «Windows Server 2012» CD and enter the «VCP login password».
Then click «Insert CD». A new CD-ROM is inserted, and you see a success message and info notification.
After you have «inserted» the CD-ROM, you can return to the Windows Setup (VNC Console), «refresh» the drives and then click «Next».

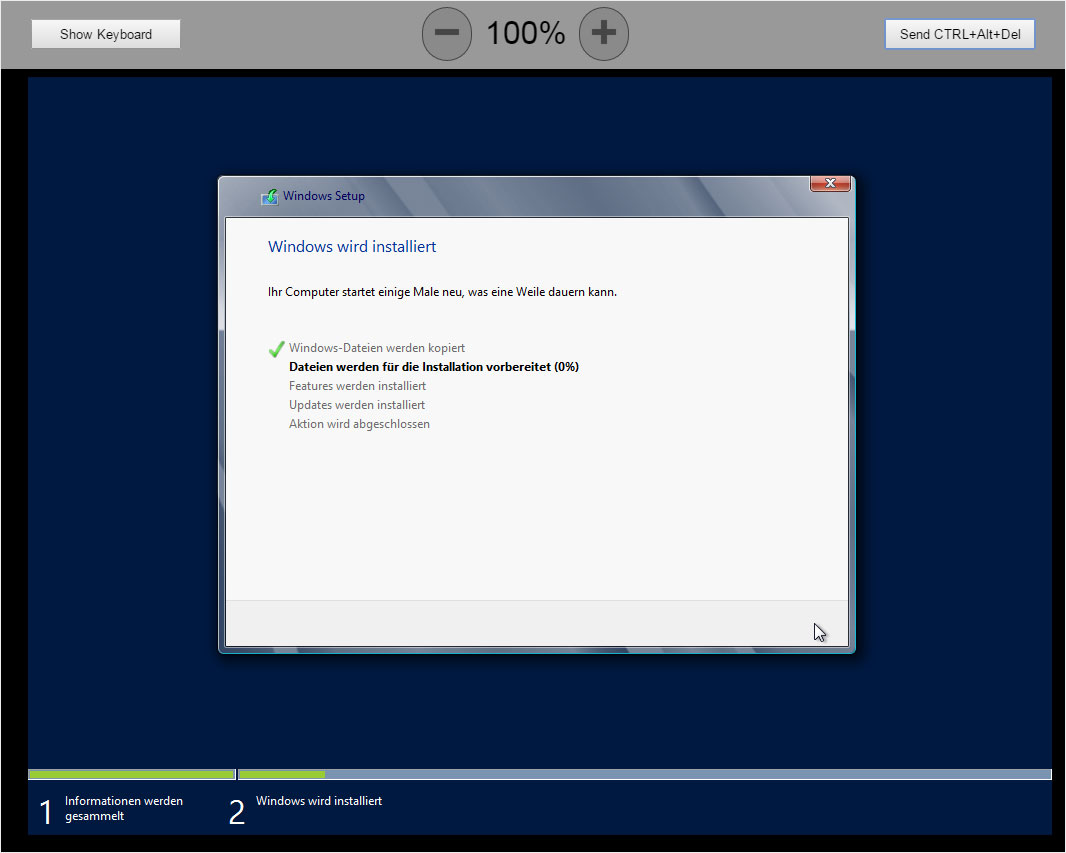
16. Installation
Windows will now be installed. This can take several minutes, and the system may restart several times. Do not interrupt the process and simply let the server complete the entire installation process.
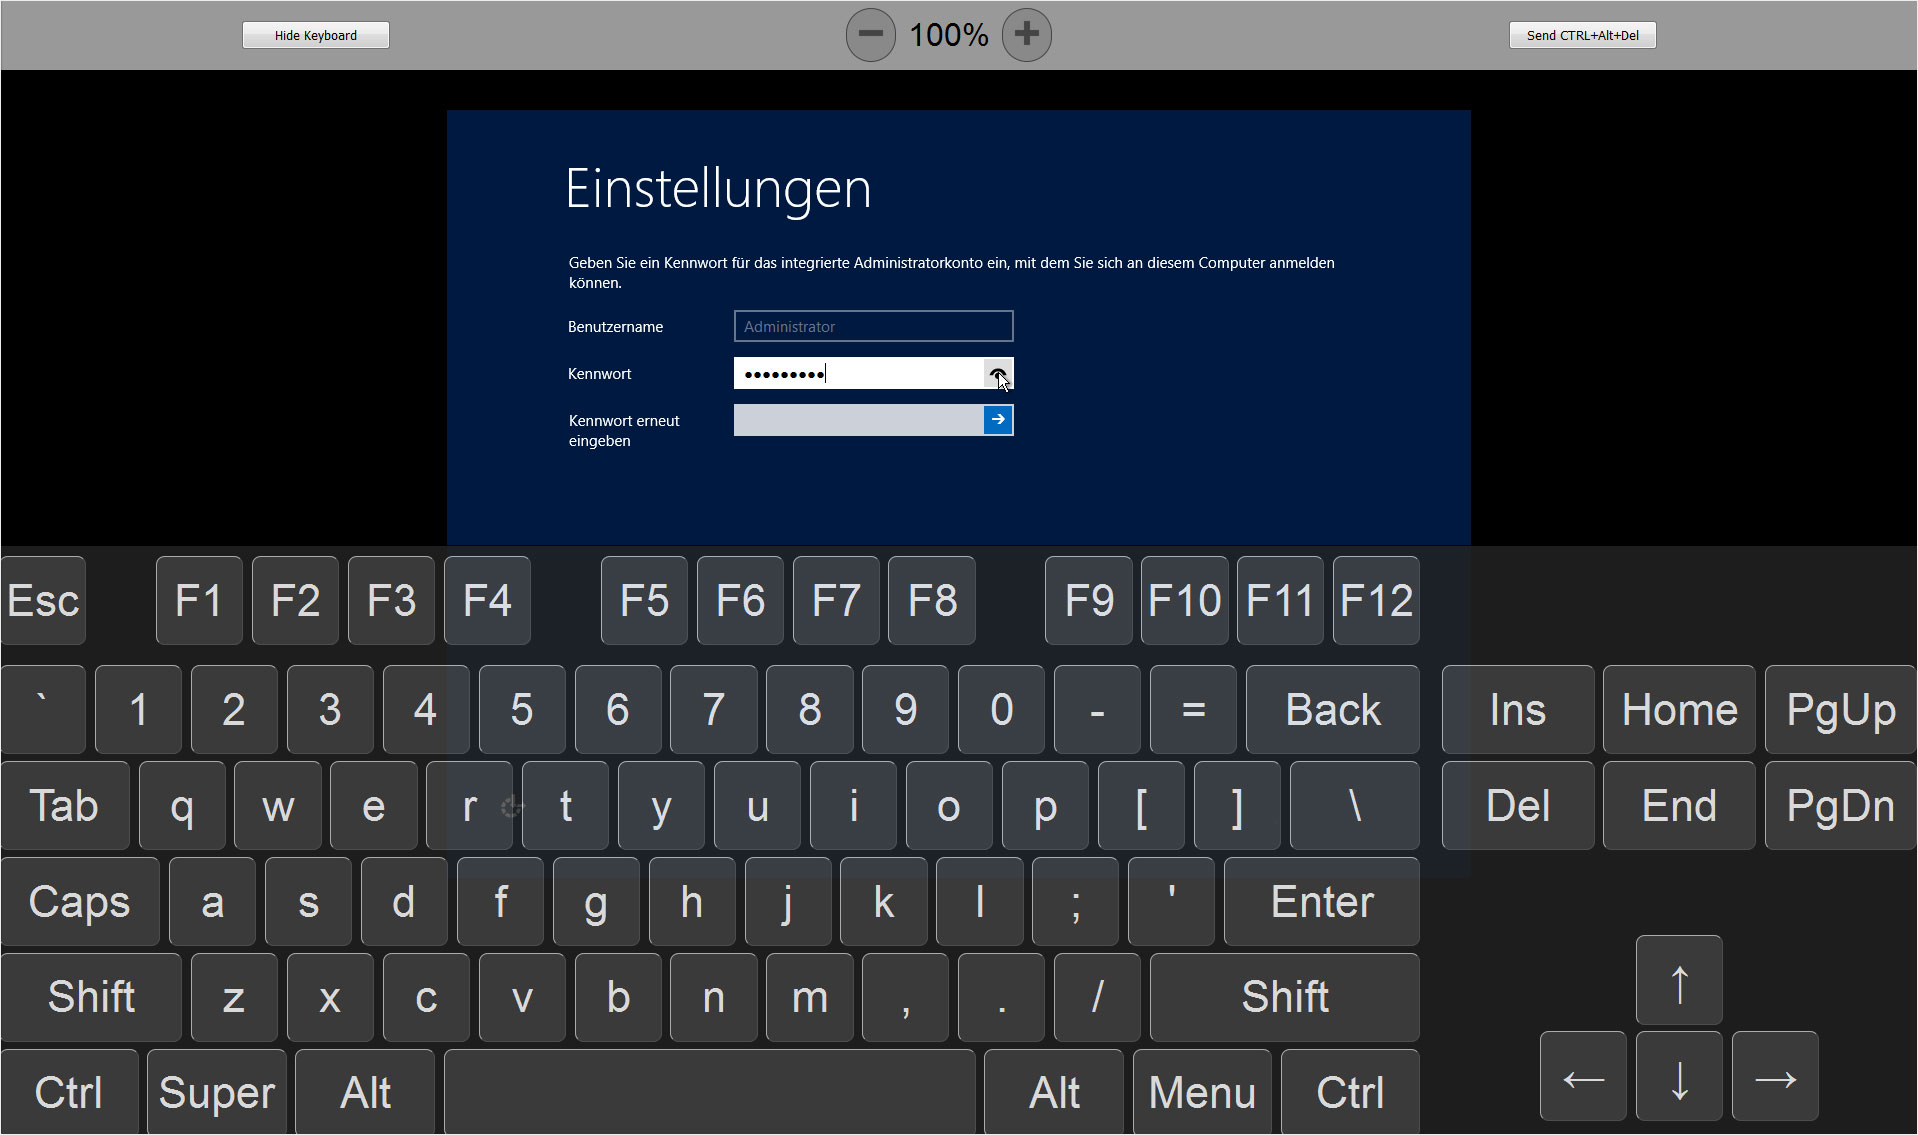
17. Administrator account
After Windows has restarted itself and the installation is complete, a dialogue appears in which you can configure the administrator account. Click «OK» to do this.
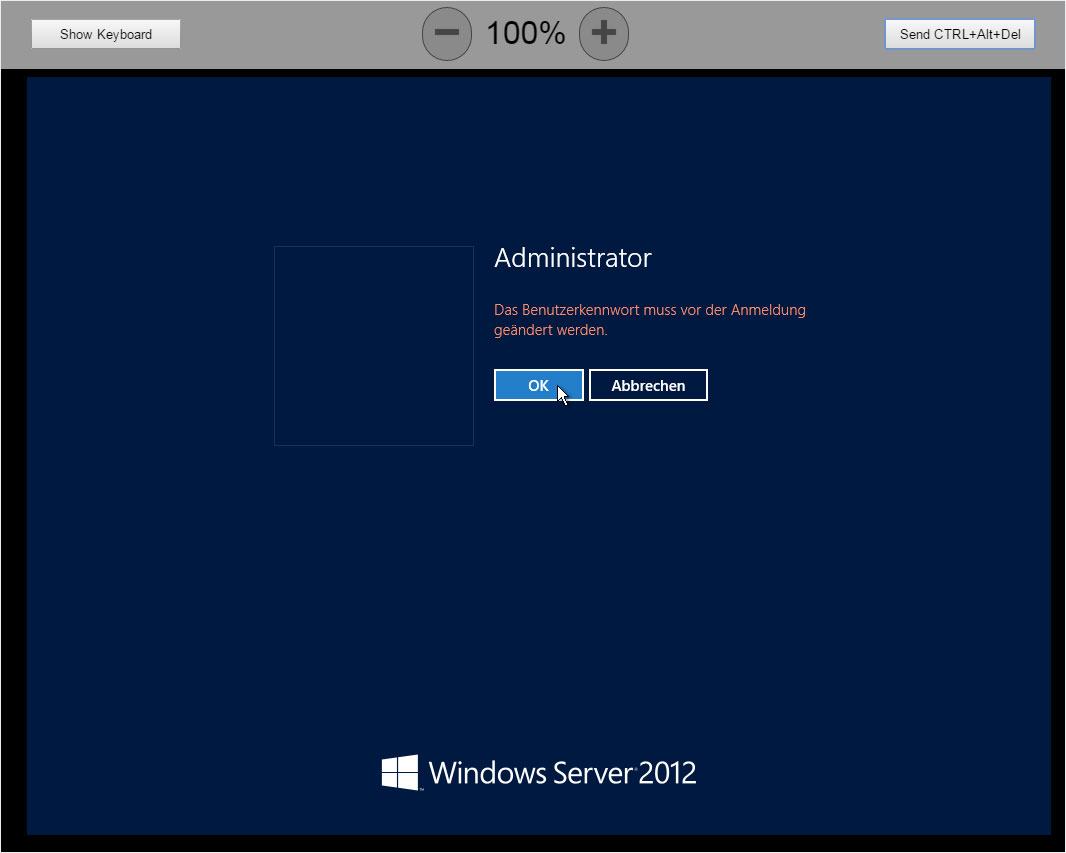
You must now set the password for the administrator account. We recommend using the «VNC Console» keyboard to avoid input mistakes due to varying keyboard layouts.
We also recommend showing the characters in the password field by clicking the icon at the right of the input field. This helps to ensure that the desired password is saved correctly.
18. Windows login
After the administrator password has been set up successfully, you can log into Windows.

19. Driver CD-ROM
Return to the «vServer Panel» and reinsert the «Windows drivers» CD-ROM to install the network drivers.
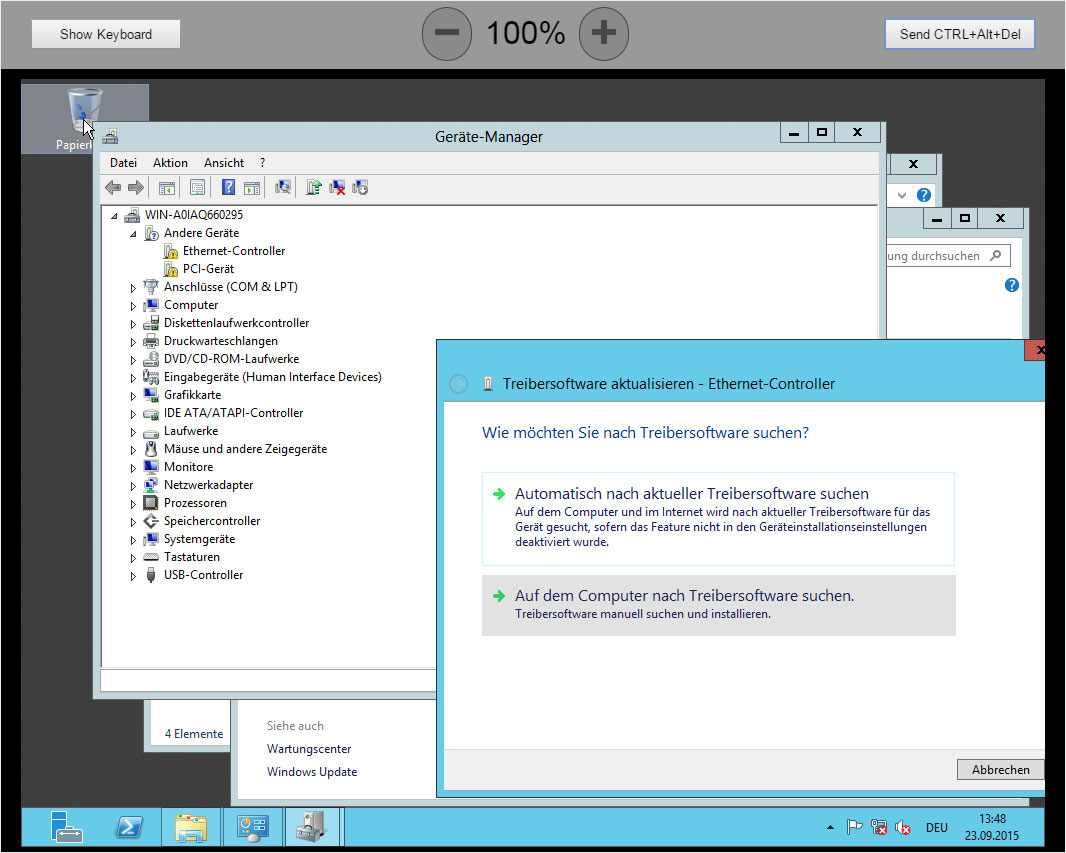
20. Device Manager
Return to Windows (VNC Console). In Windows Explorer, right-click «Computer» and select «Properties».
Select «Device Manager». In the «Device Manager», right-click on «Ethernet Controller» and then «Update driver». Then «Search for drivers on this computer».
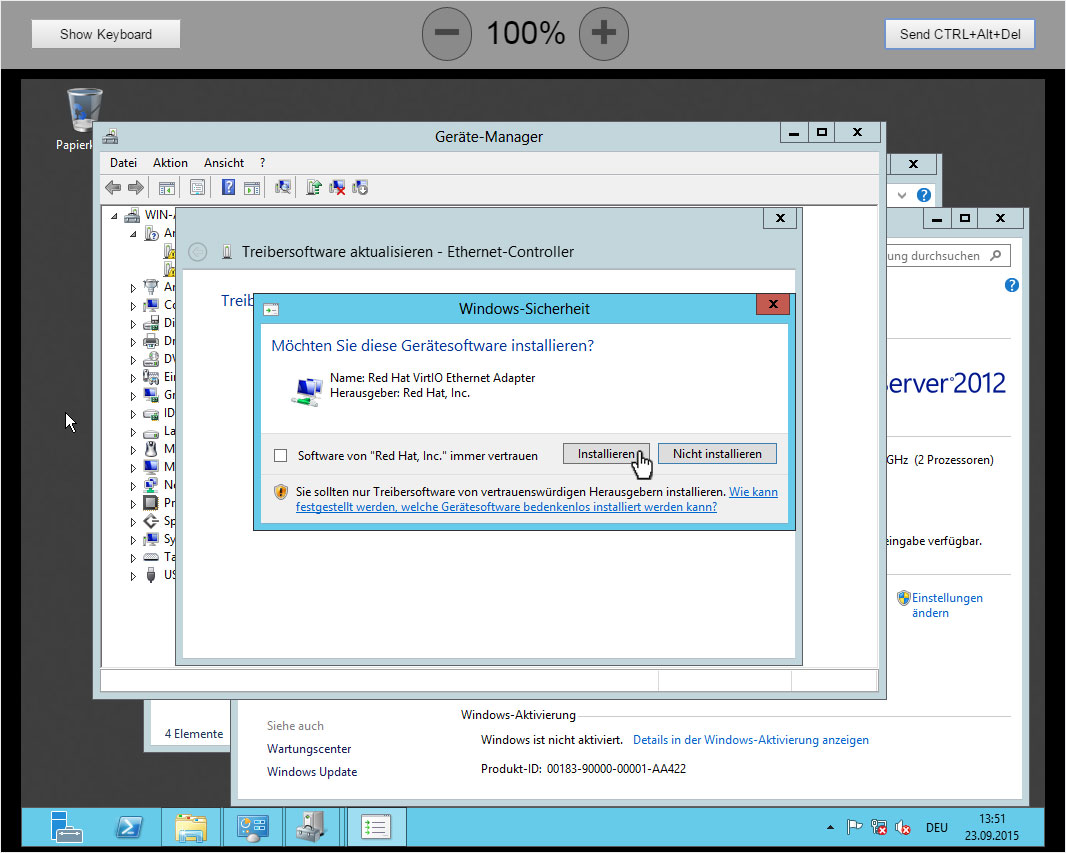
21. Network connection
Click «Browse» and then select the path «CD drive». Click «Next» and install the driver. You can now test the network connection.
22. Finish
The basic installation of Windows Server 2012 is now complete. Install all required updates and configure the server as per your requirements.