Backup administration
The Hosting menu item comprises the following sub-pages: Overview, Settings, Databases, FTP, SSH, Cronjobs, Backup, ModSecurity, SSL certificates, Software, Statistics, and Monitoring.
Under Backup, you can manage your backups and create new ones.
Backup overview
All automatically and manually created backups are displayed here. You can also easily restore backups here.
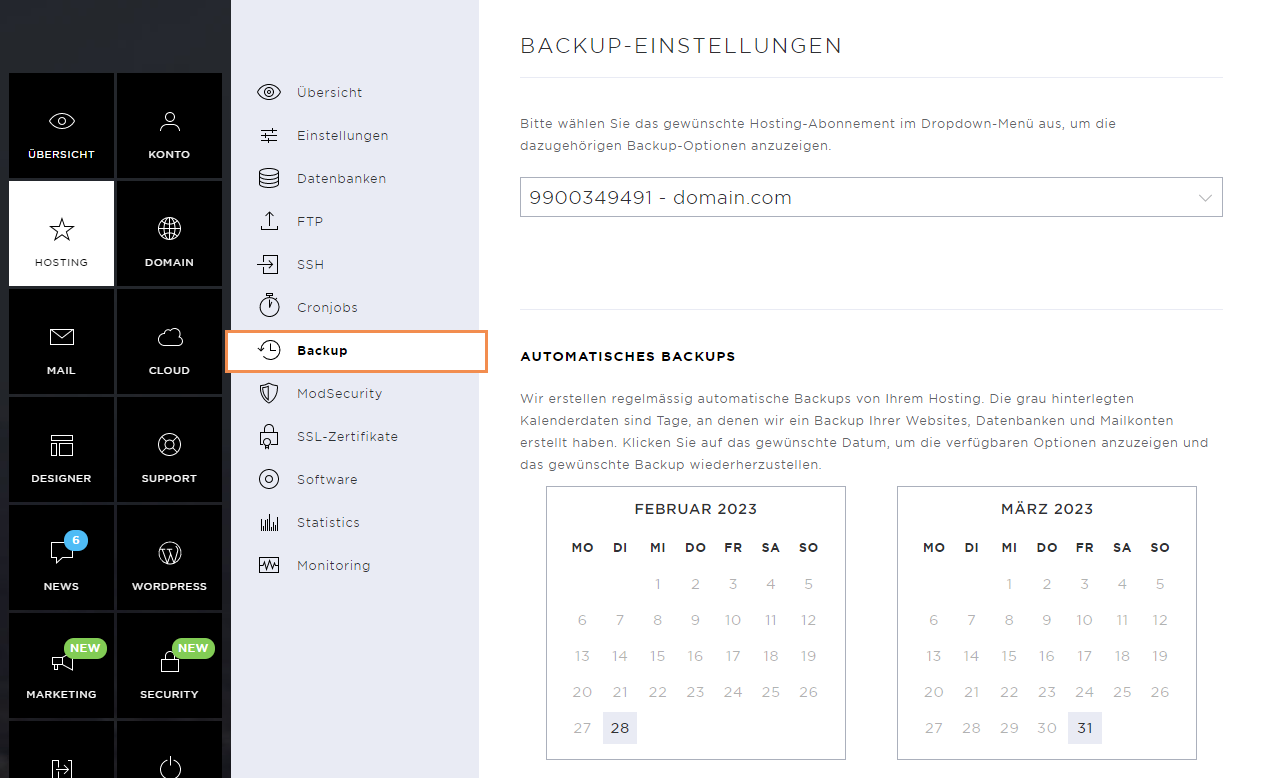
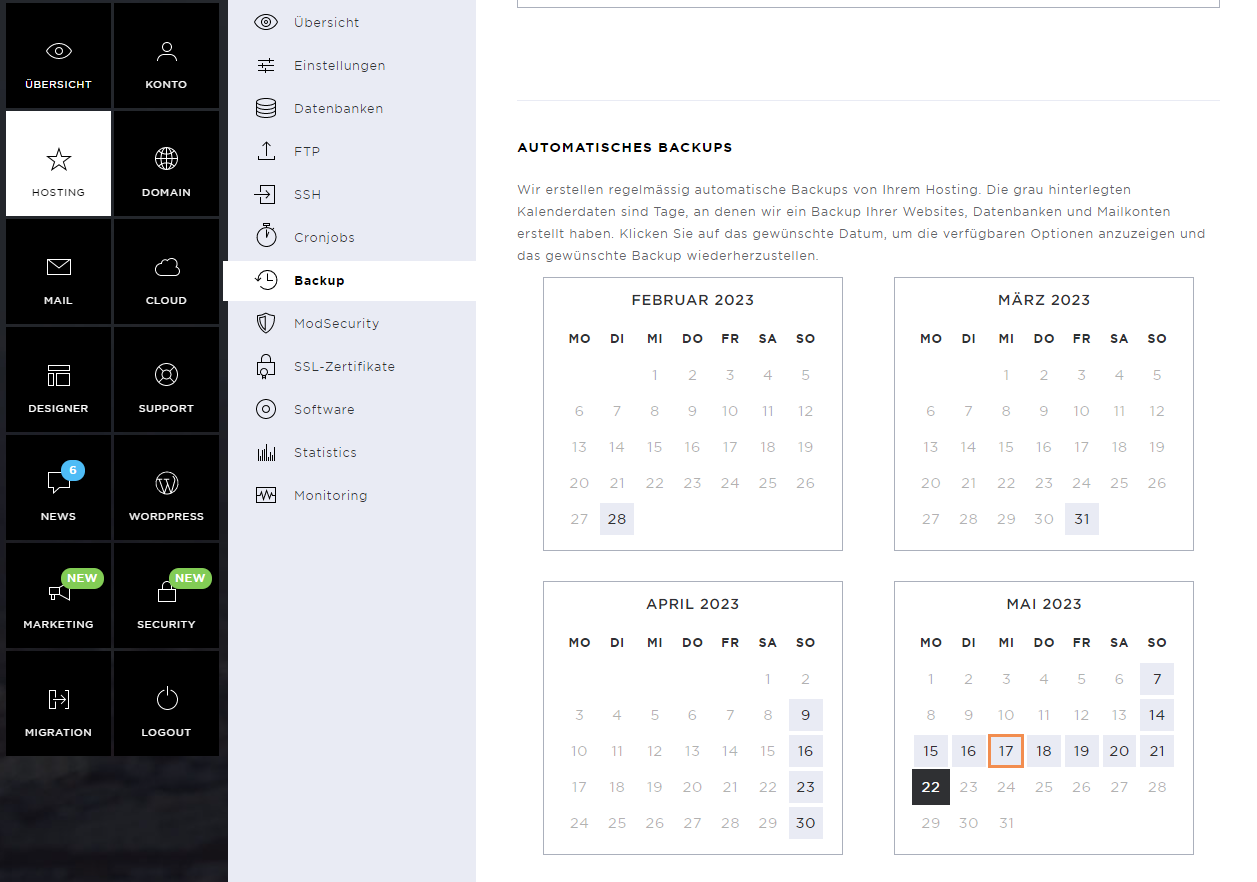
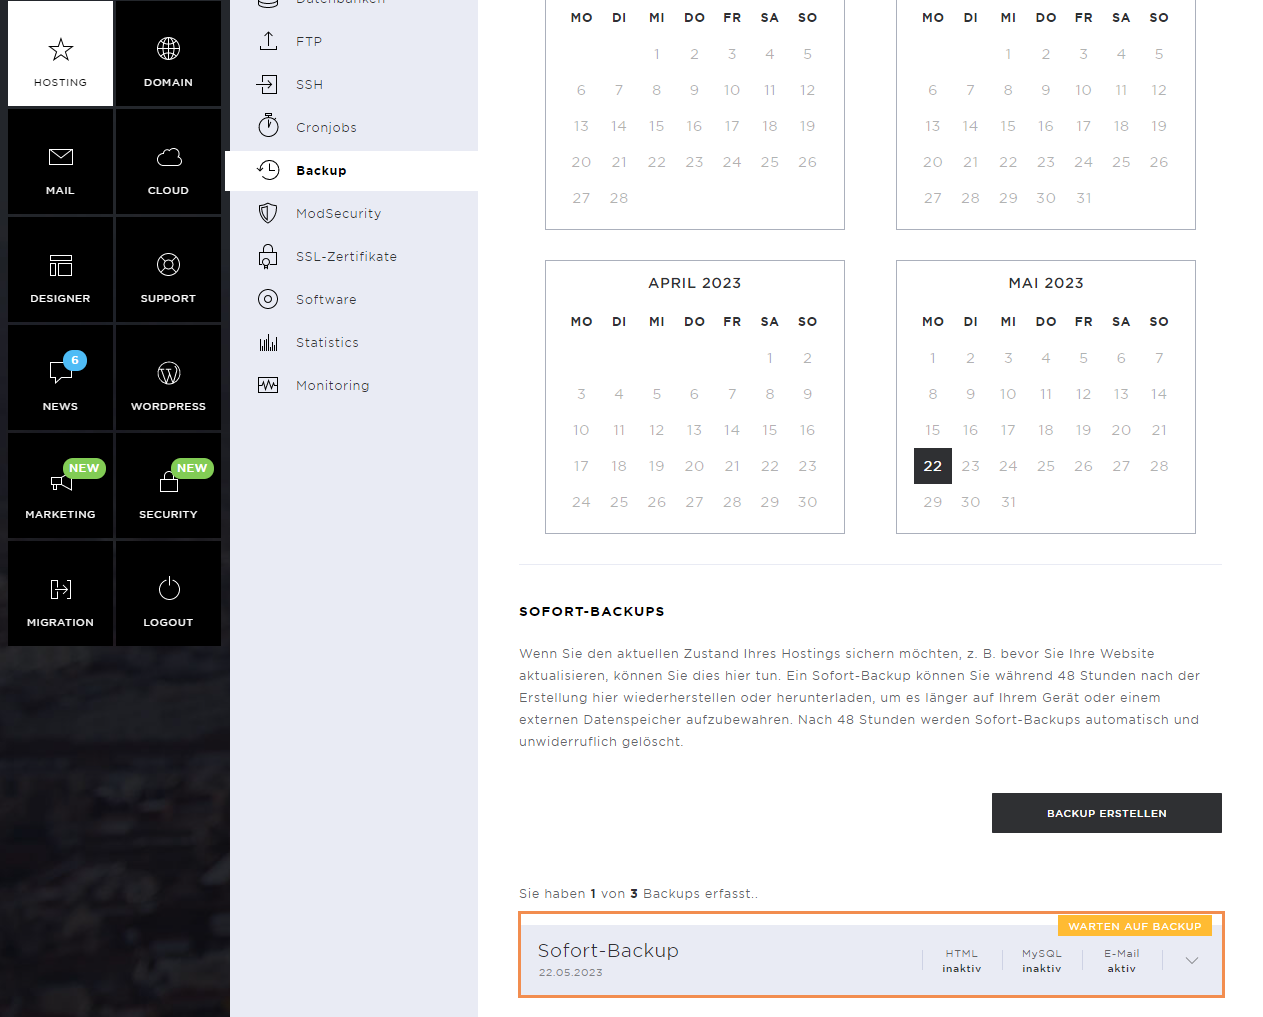
Automatic backups
The automatically created backups are available to you up to several weeks back.
Here you can see from which days the backup data is available. They can be restored accordingly.

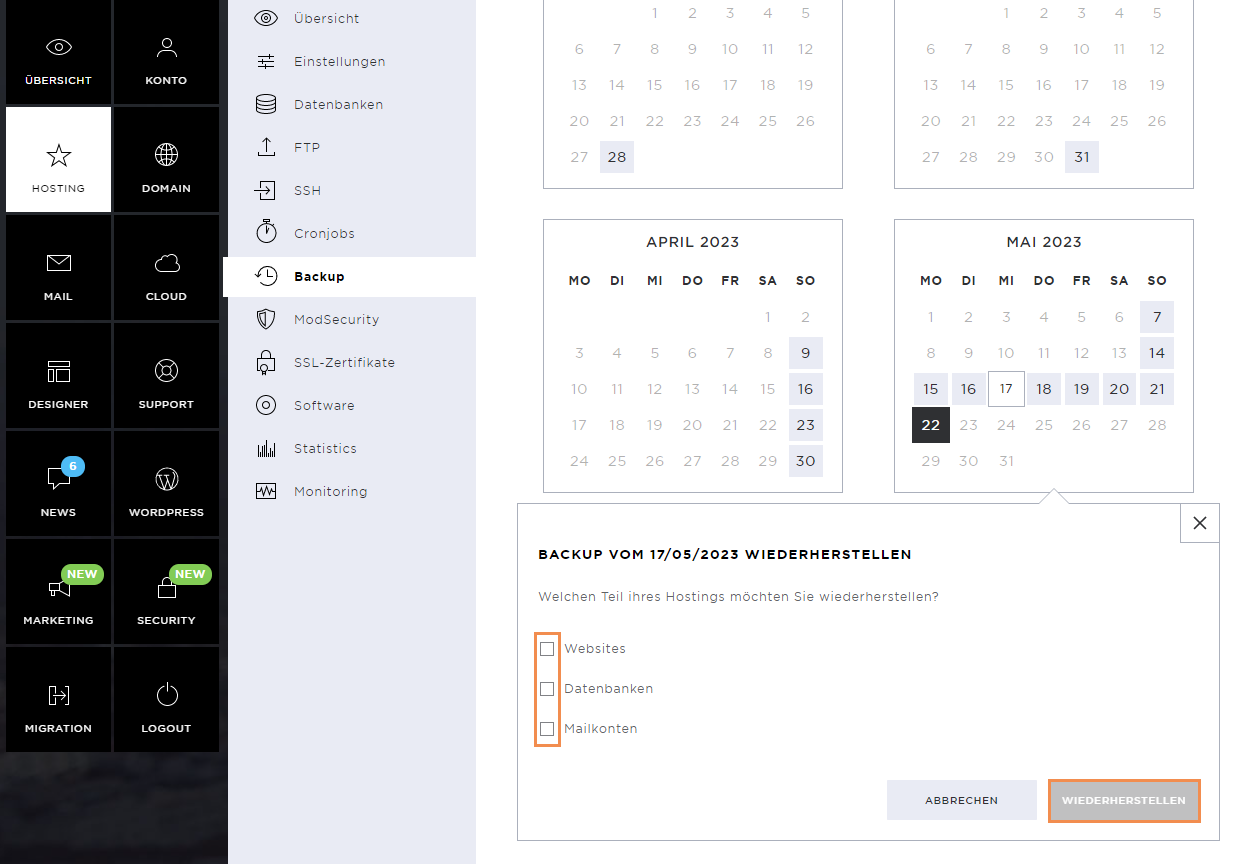
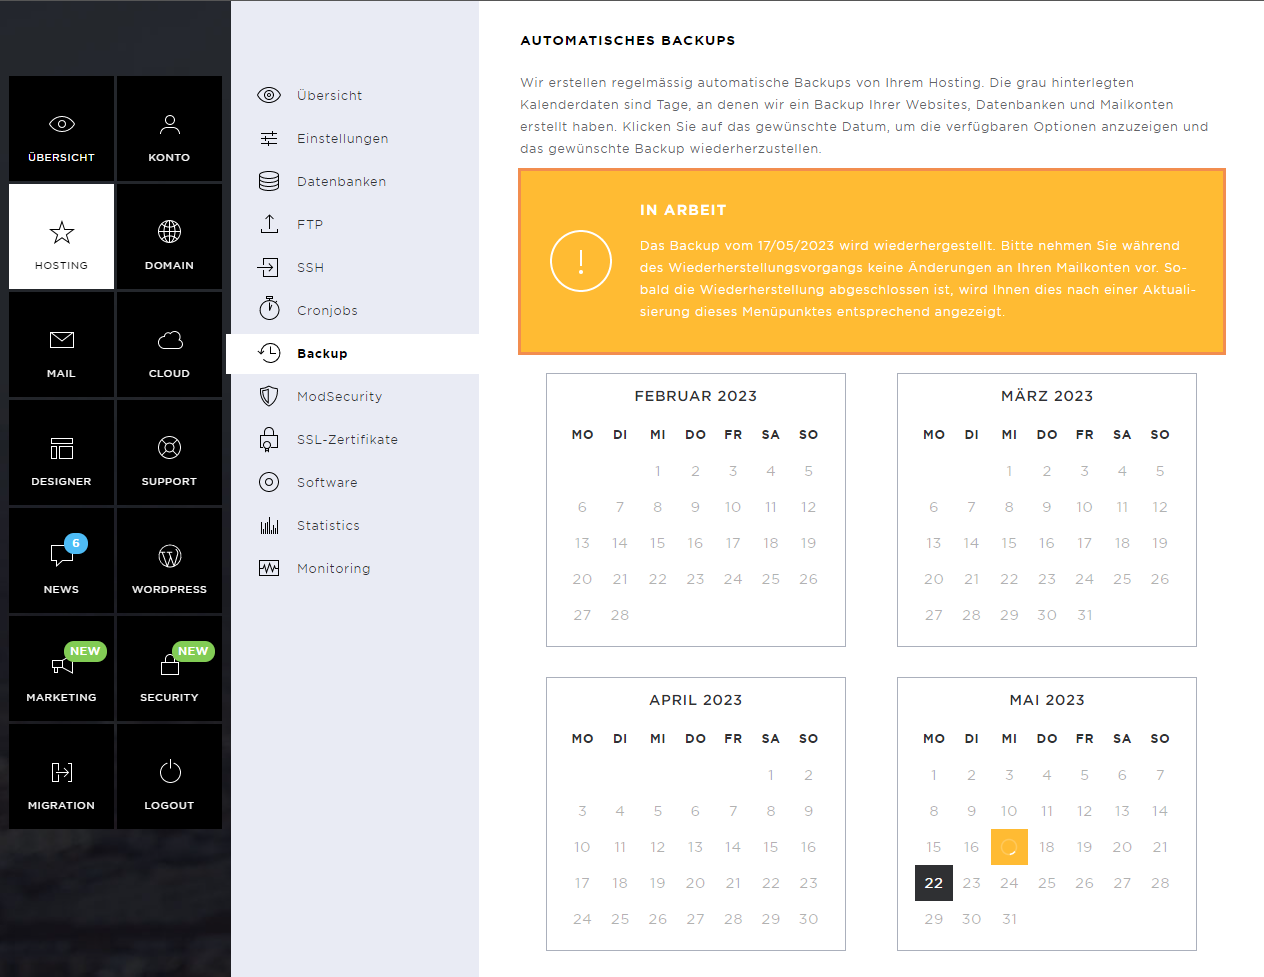
Restore automatic backups
Click on the desired date in the calendar view.
Select the part of the hosting you want to restore and click on it.
Please note that you cannot restore individual websites, databases, or mail accounts. All websites, databases, or mail accounts in your hosting are always restored to the corresponding date all at once.
If you agree, click on Restore.
After confirmation, the restoration is started. Depending on the memory allocation of the selected data, this may take longer.
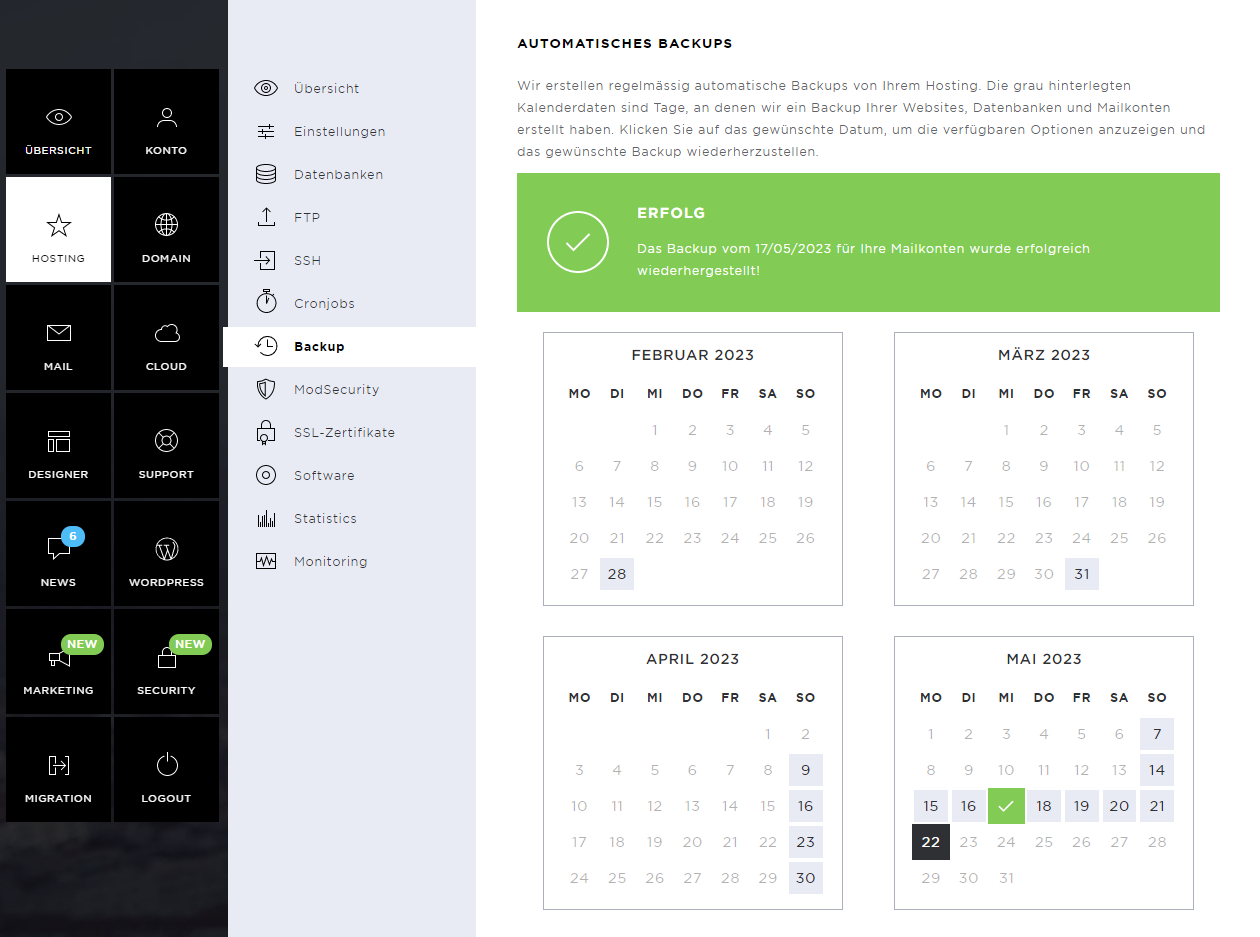
As soon as the restoration has been completed, a success message appears.
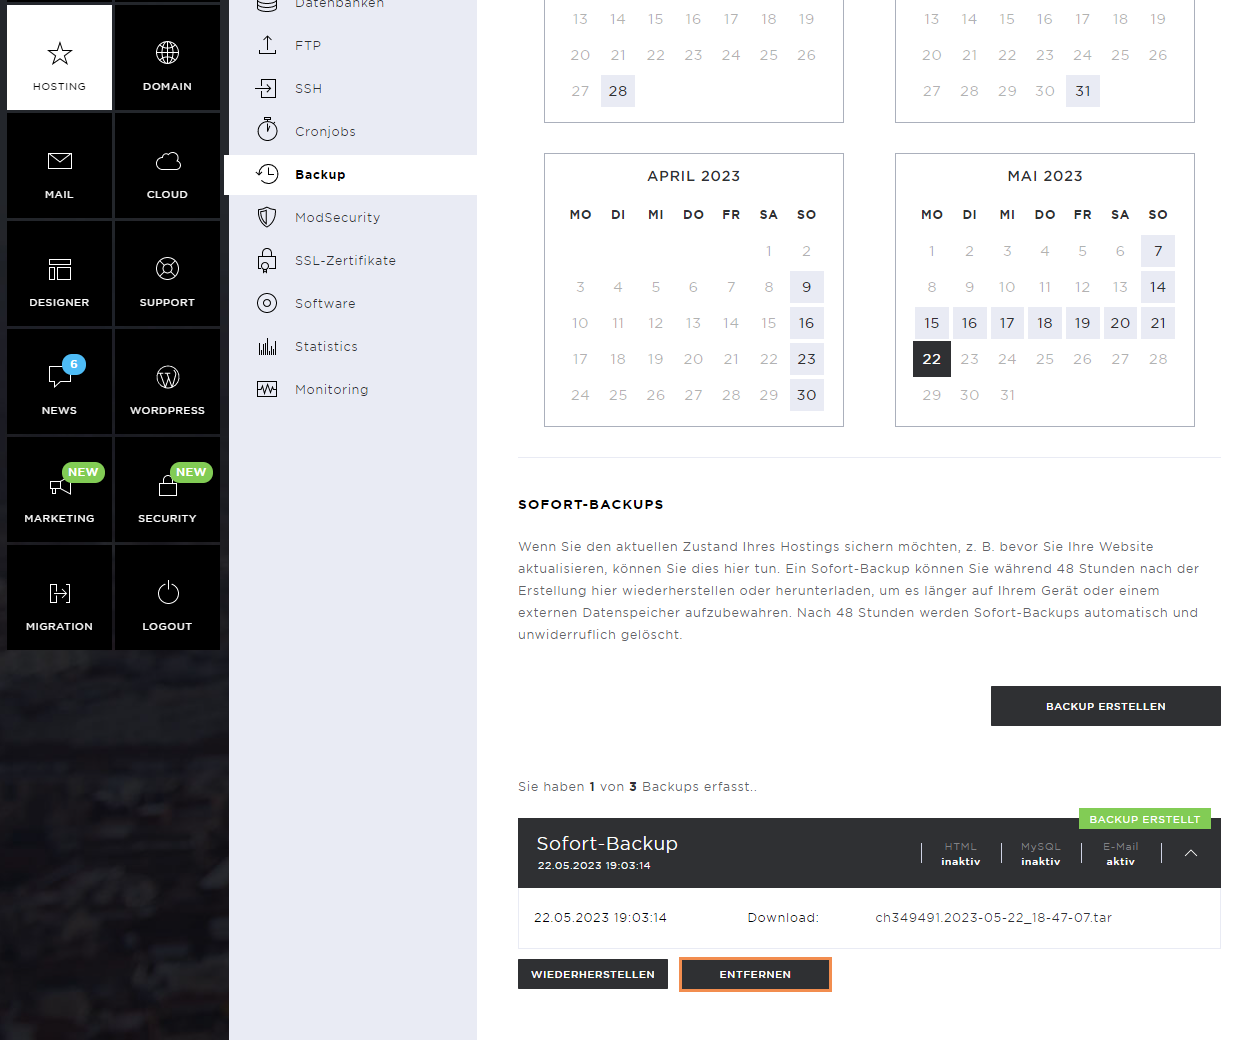
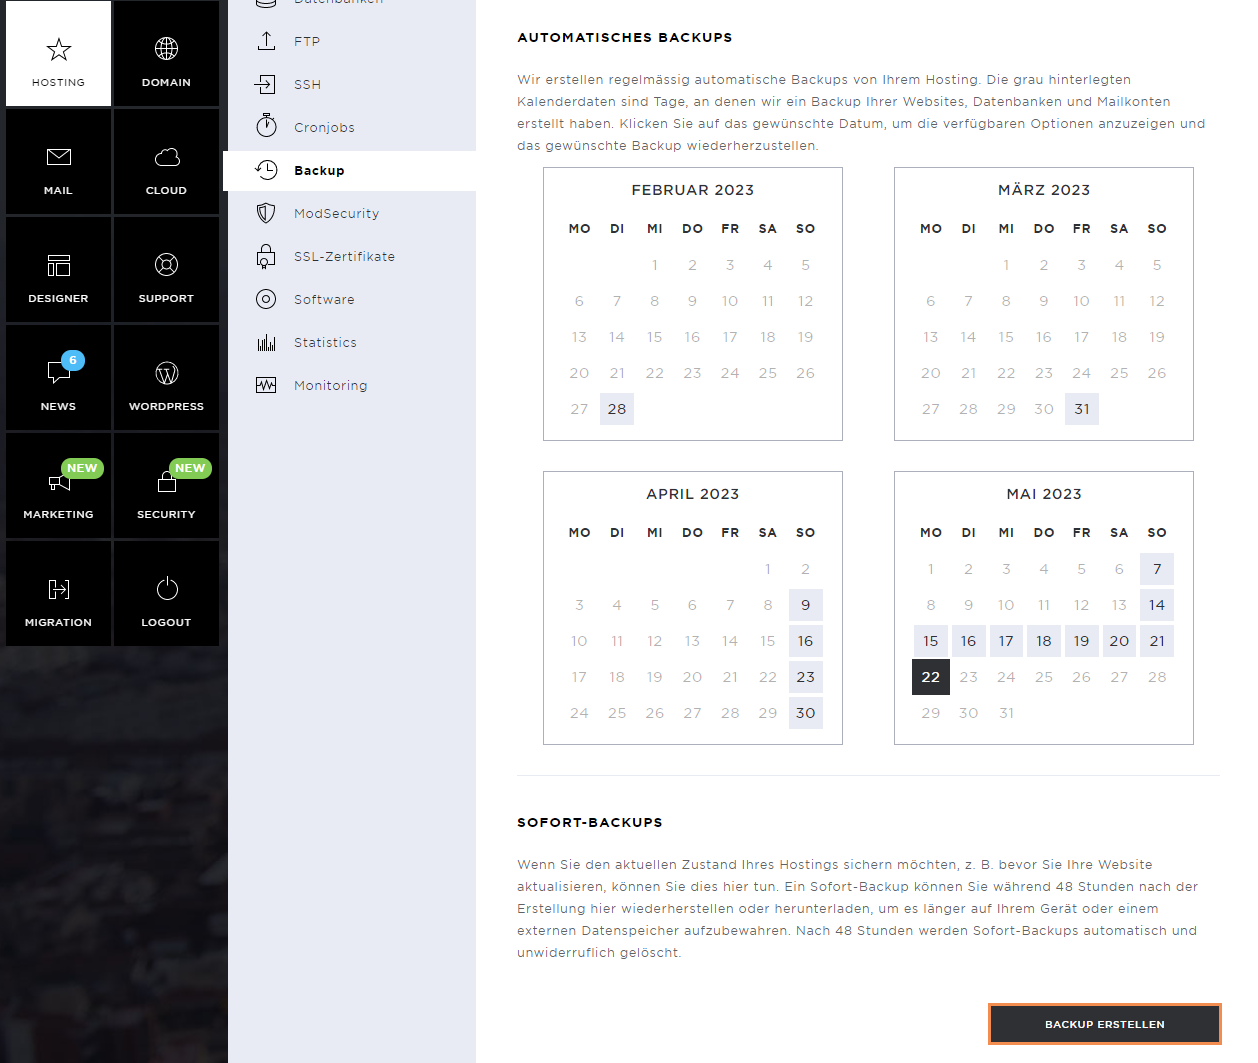
Instant Backups
To create an instant backup, click the Create Backup button in the Instant Backups section.
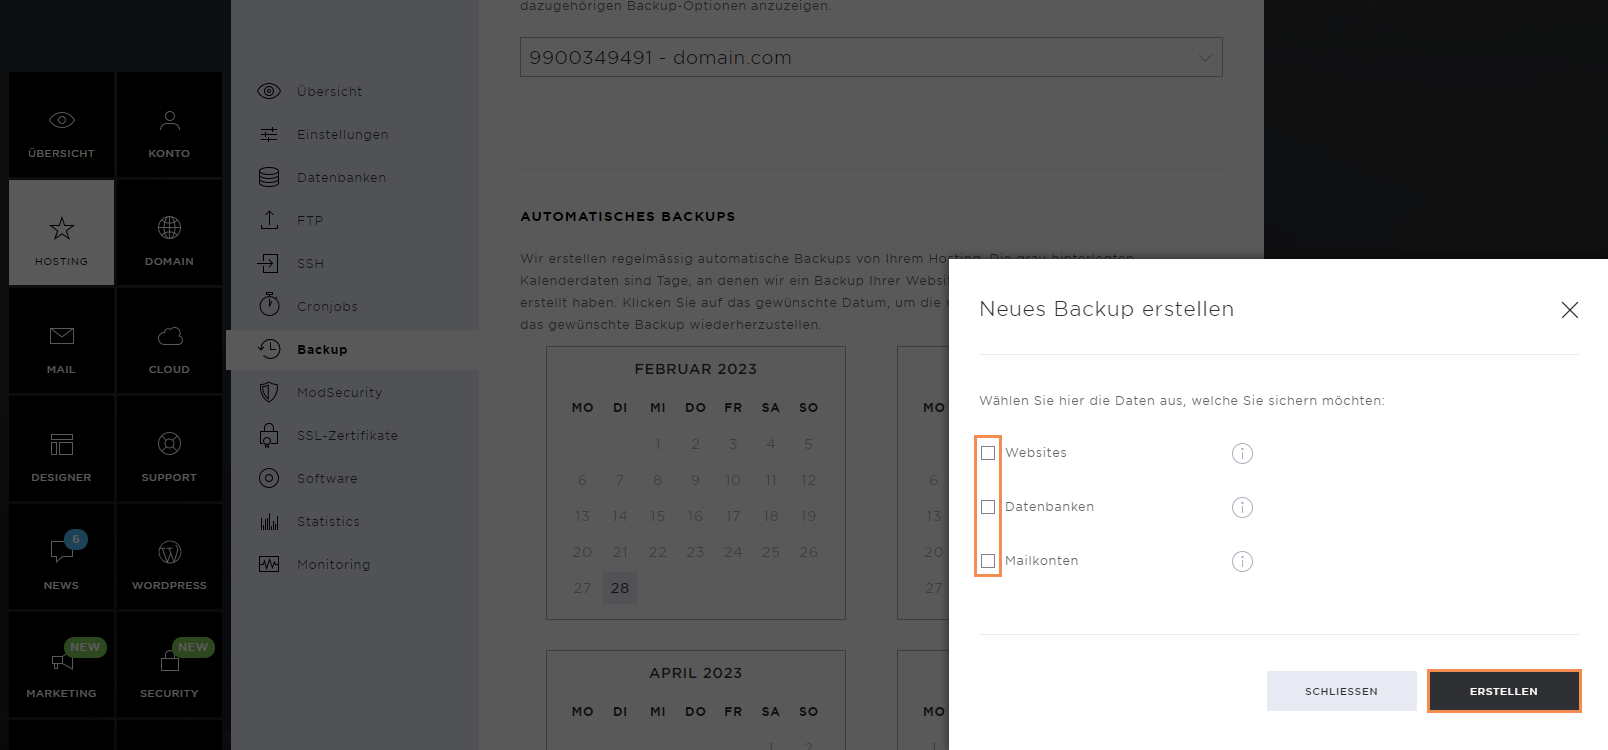
Note that, by creating a backup, you consent to your data being processed.
Click on Next.

Select the part of the hosting you want to back up and then click Create.
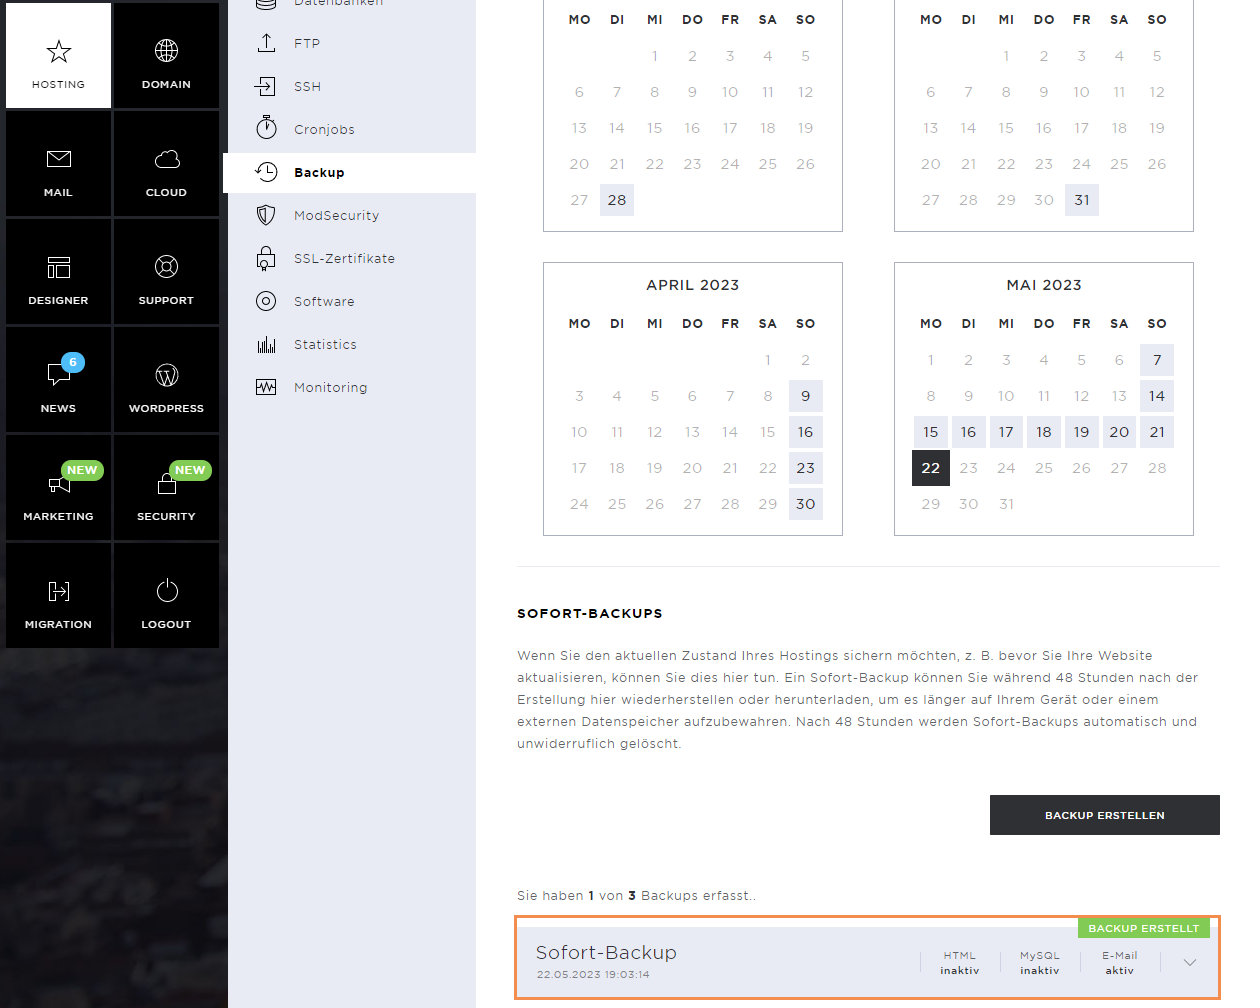
The backup is created, which can take some time. The file size also plays a role here.
As soon as the backup is completed, a success message appears.
Restore Instant Backup
To restore an instant backup, click on the desired backup and then on Restore.
In the pop-up window, confirm the data to be restored and click Restore again.
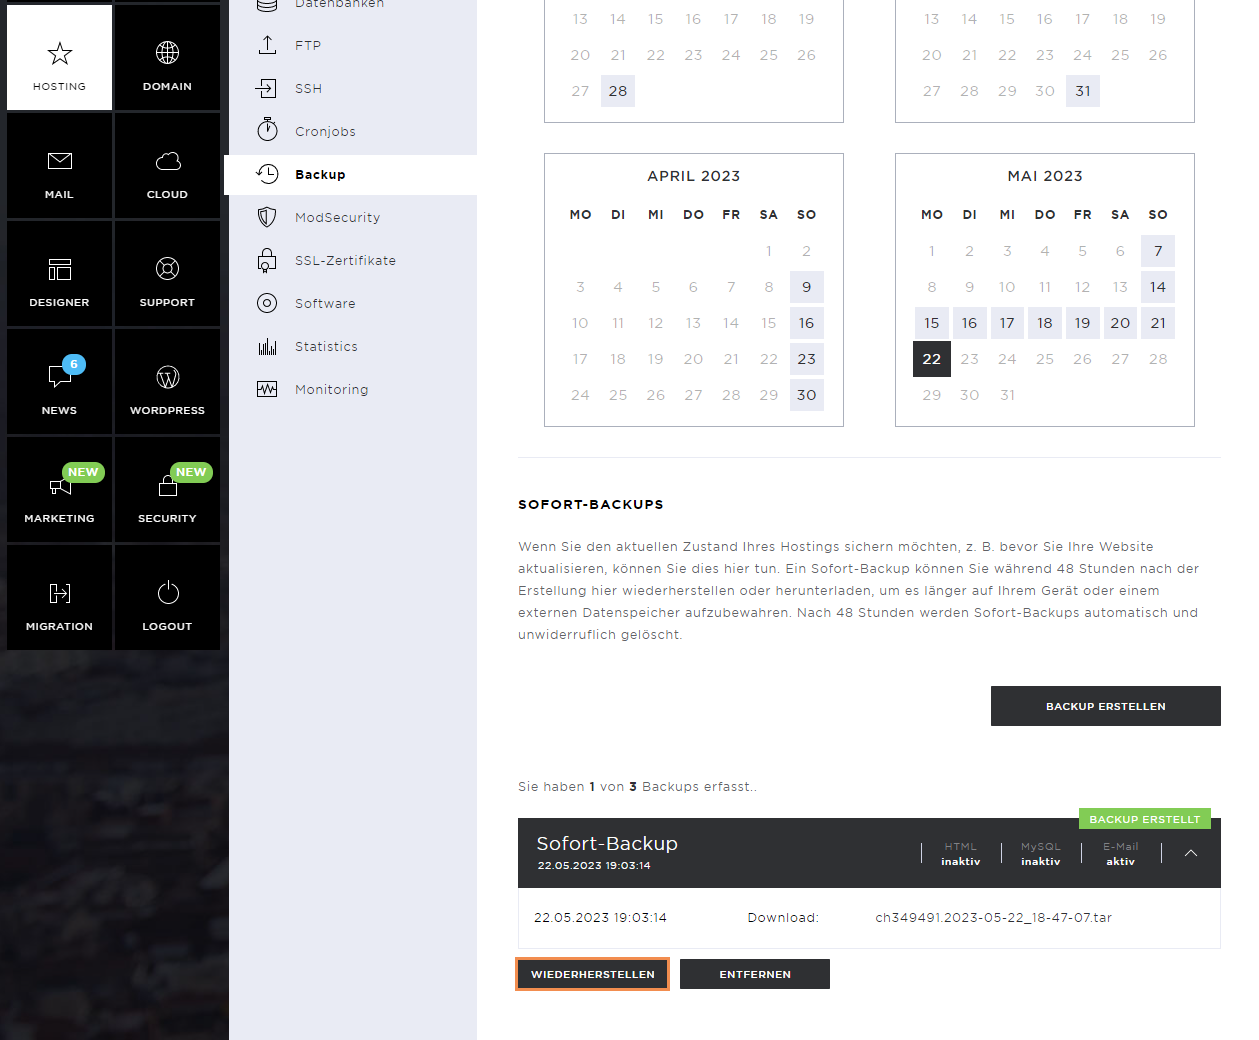
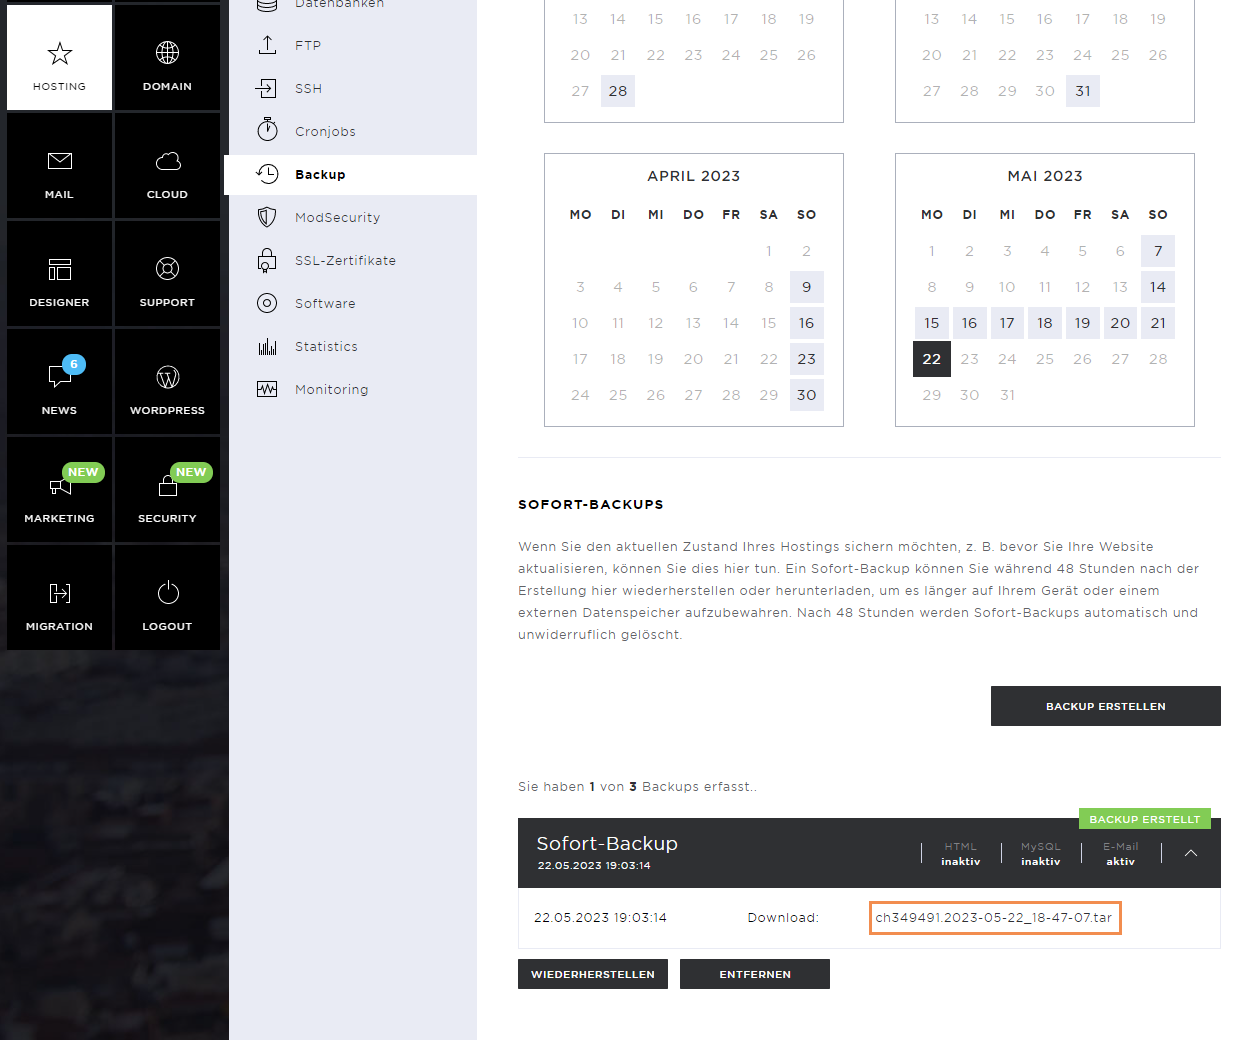
Download Instant Backup
You can download an instant backup by clicking on the download link provided.
Remove Instant Backup
To delete the instant backup, click on the Remove button.
Confirm this again by clicking on Remove.