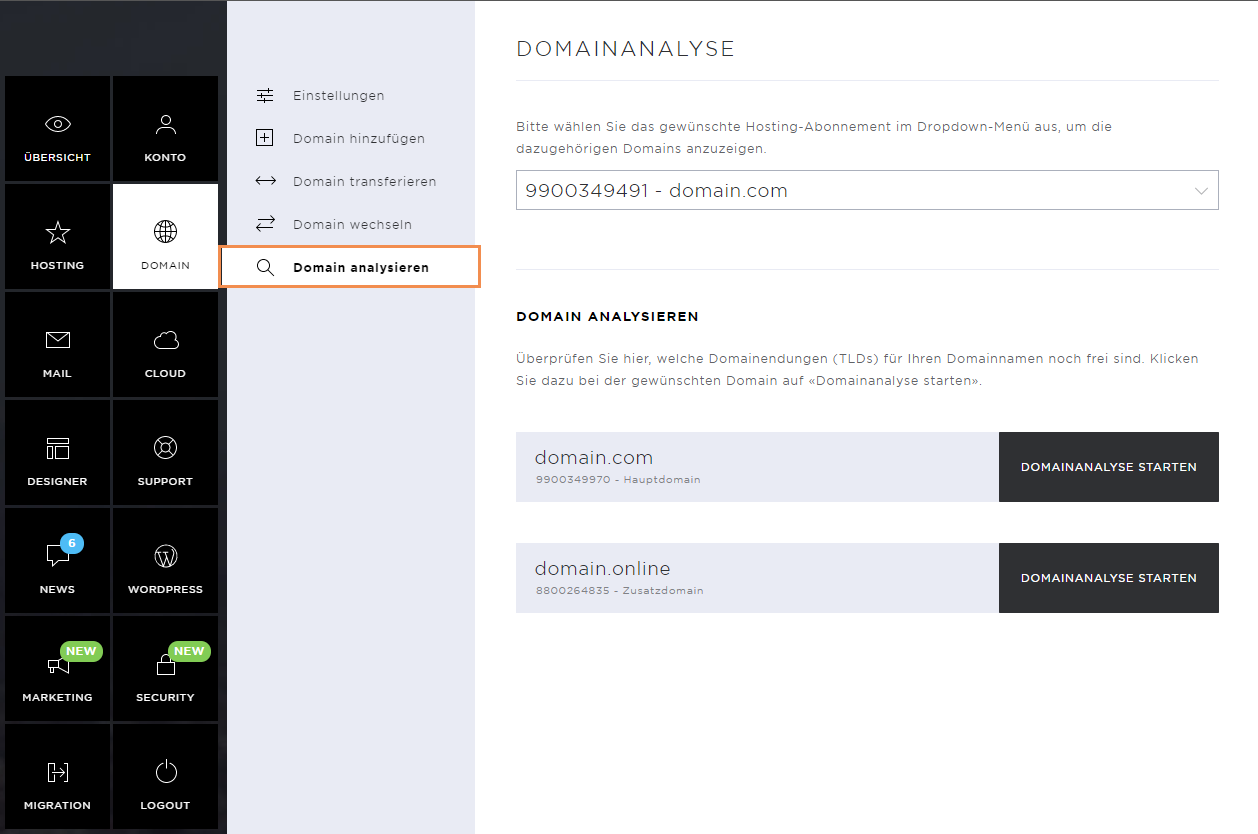
Domain settings
Here you can manage all domains centrally in one place. In addition, the name server and DNS entries can be changed, or additional domains can be added.
The domain section includes the subpages:
Settings
Under the menu item Settings, you can see which domains are actively used for your hosting.
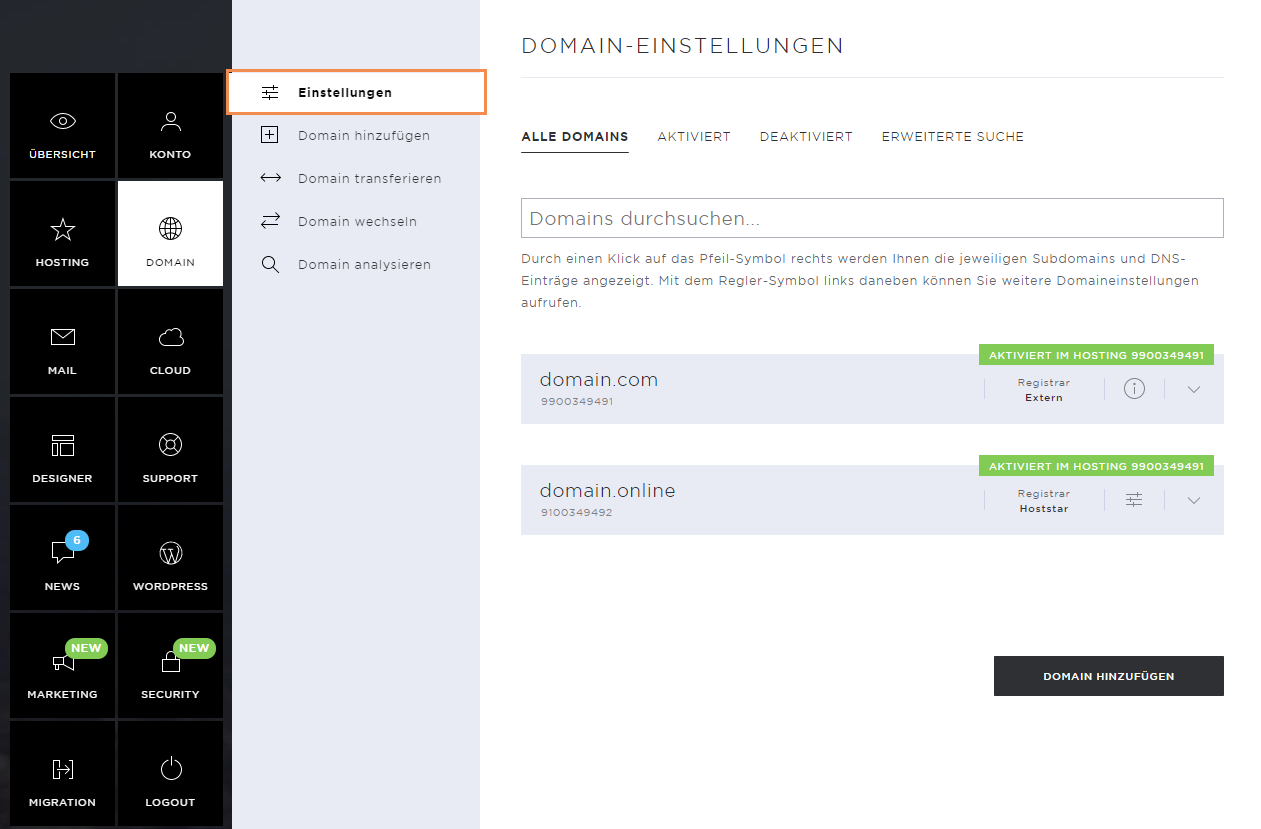
Change name server
To change the name server entries of a domain, click on the Change name server button.
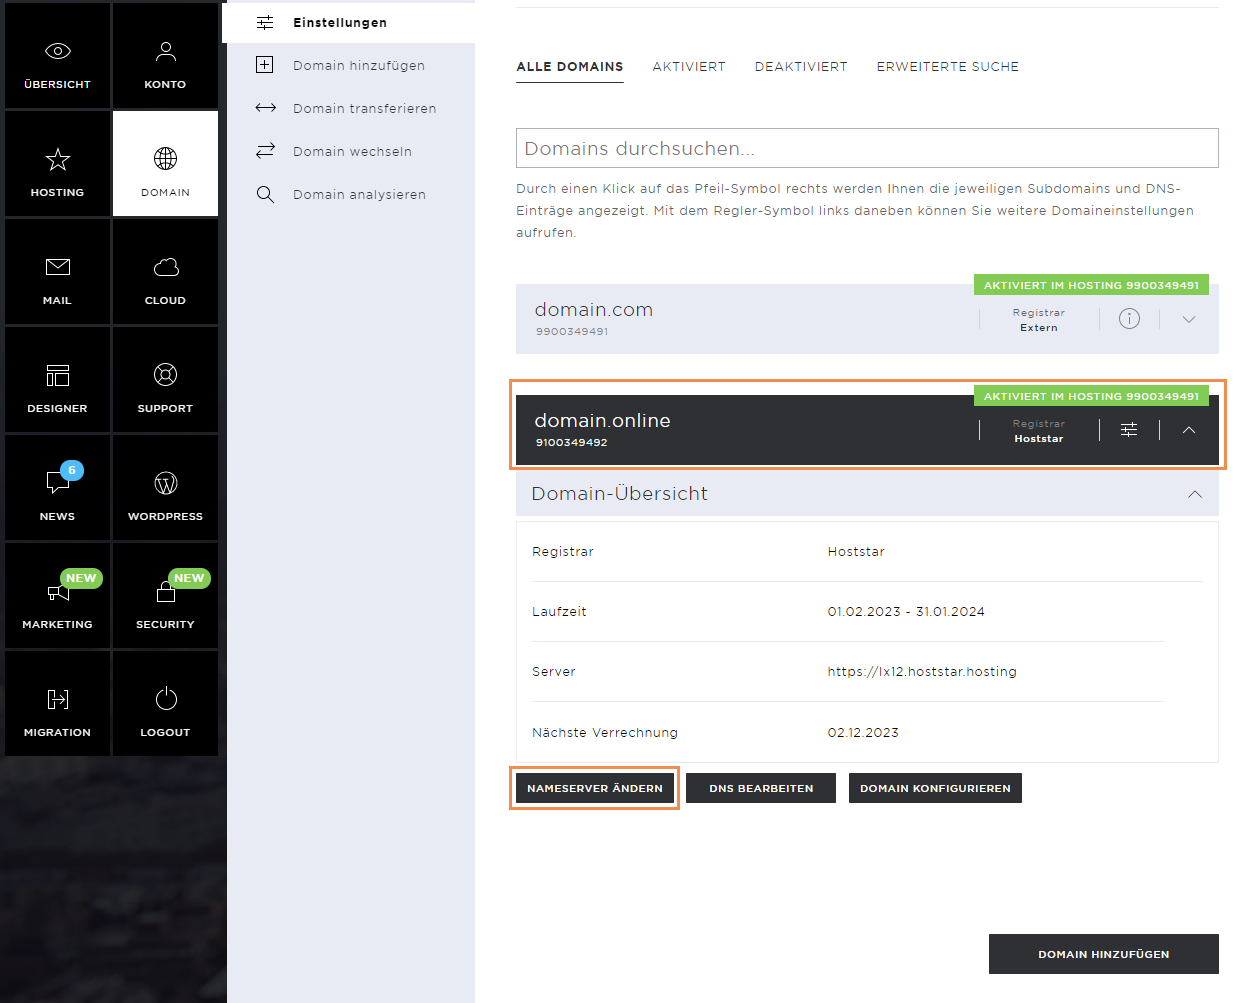
Now enter the new name servers and confirm the changes by clicking on Save. The propagation time of the name servers can be between 24 and 48 hours.
Please note that the name servers of a domain can only be changed via the My Panel if the domain was registered via Hoststar.
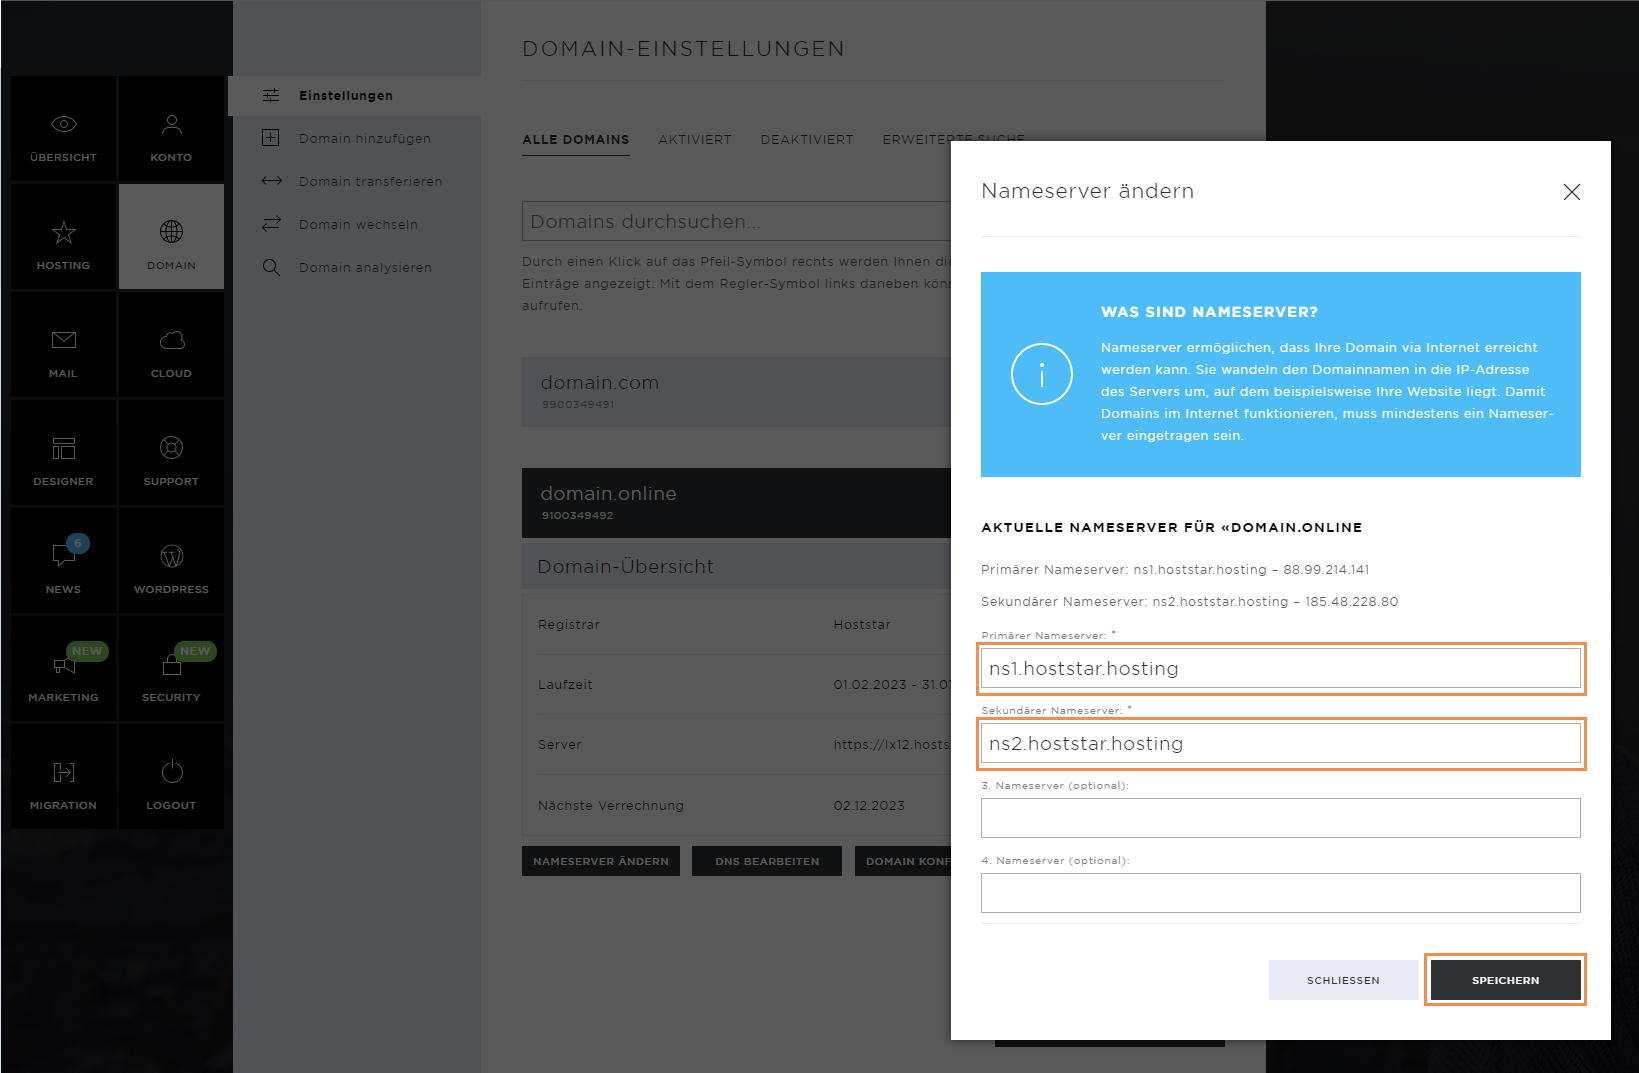
Edit DNS
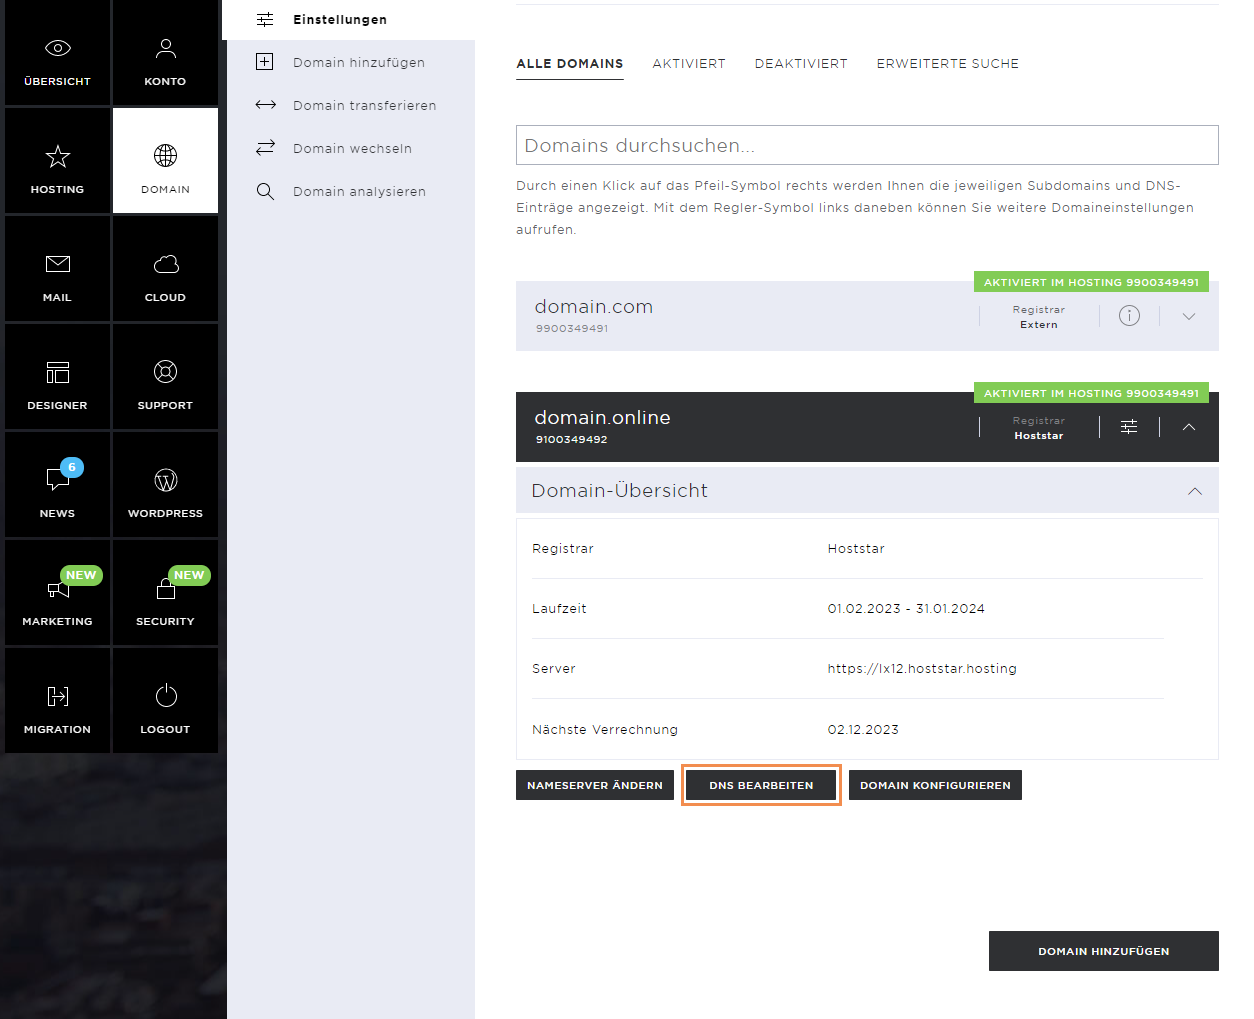
In the domain settings, you can call up and edit the DNS zone of the corresponding domain using the DNS Edit button.
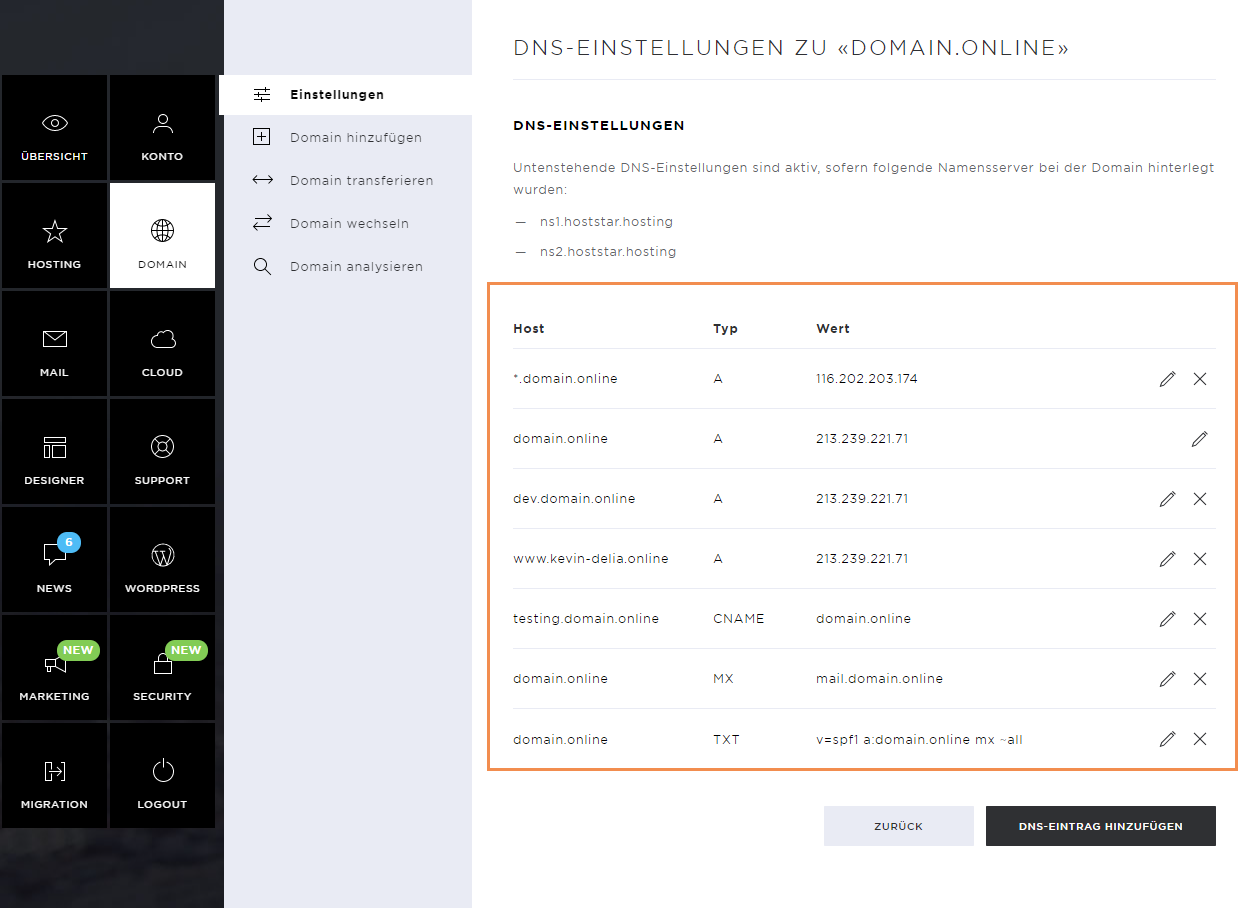
In the new window you will see the DNS zone of the domain. Here, you can edit existing entries by clicking on the pencil icon. To remove an entry, click the X icon.
Note that the DNS zone should always be edited with care, as changes could also have negative effects on certain services.
Add DNS entry
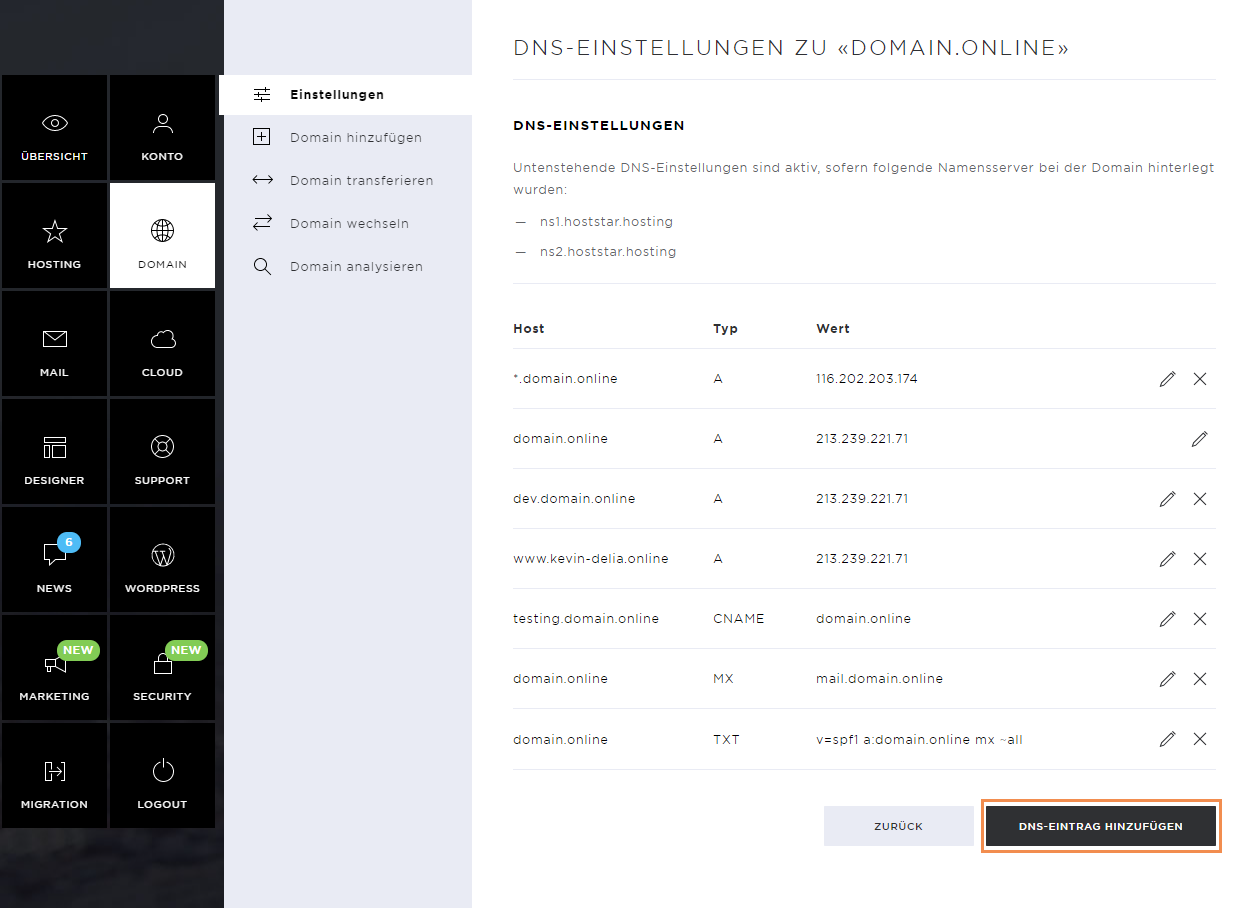
Click on Add DNS Entry to create a new entry.
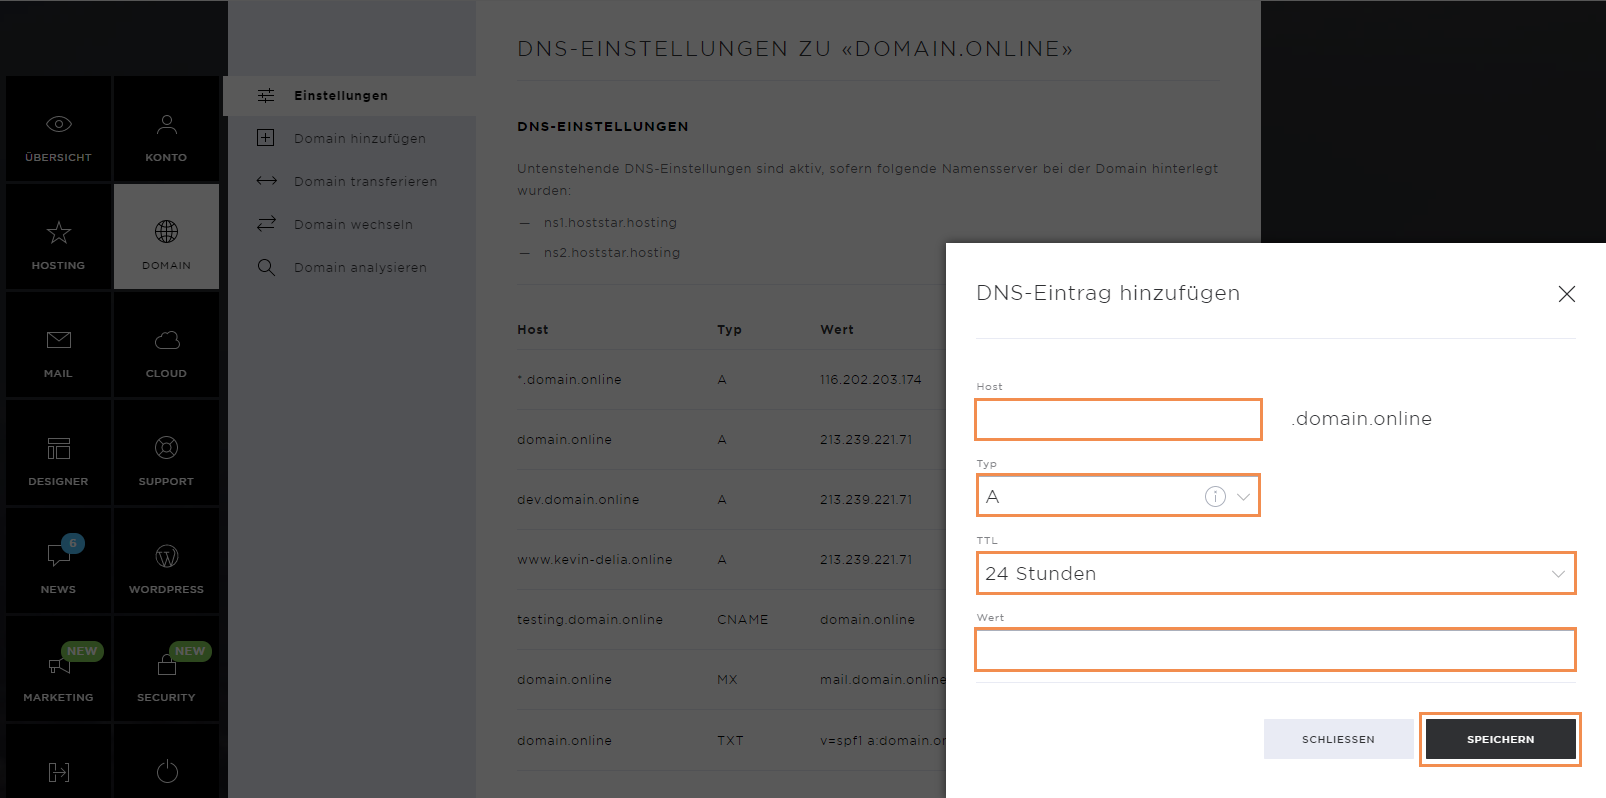
Enter the following information so that the new entry can be stored:
- Host (can also be a subdomain)
- Type (entry type)
- TTL (Time to live)
- Value
The following entry types / DNS entries are available:
- A Entry
- AAAA entry
- CNAME
- MX
- SRV
- TXT
As soon as you have entered the data, you can save the entry by pressing Save. The DNS entry will be valid in a few hours (depending on the TTL set).
Configure domain
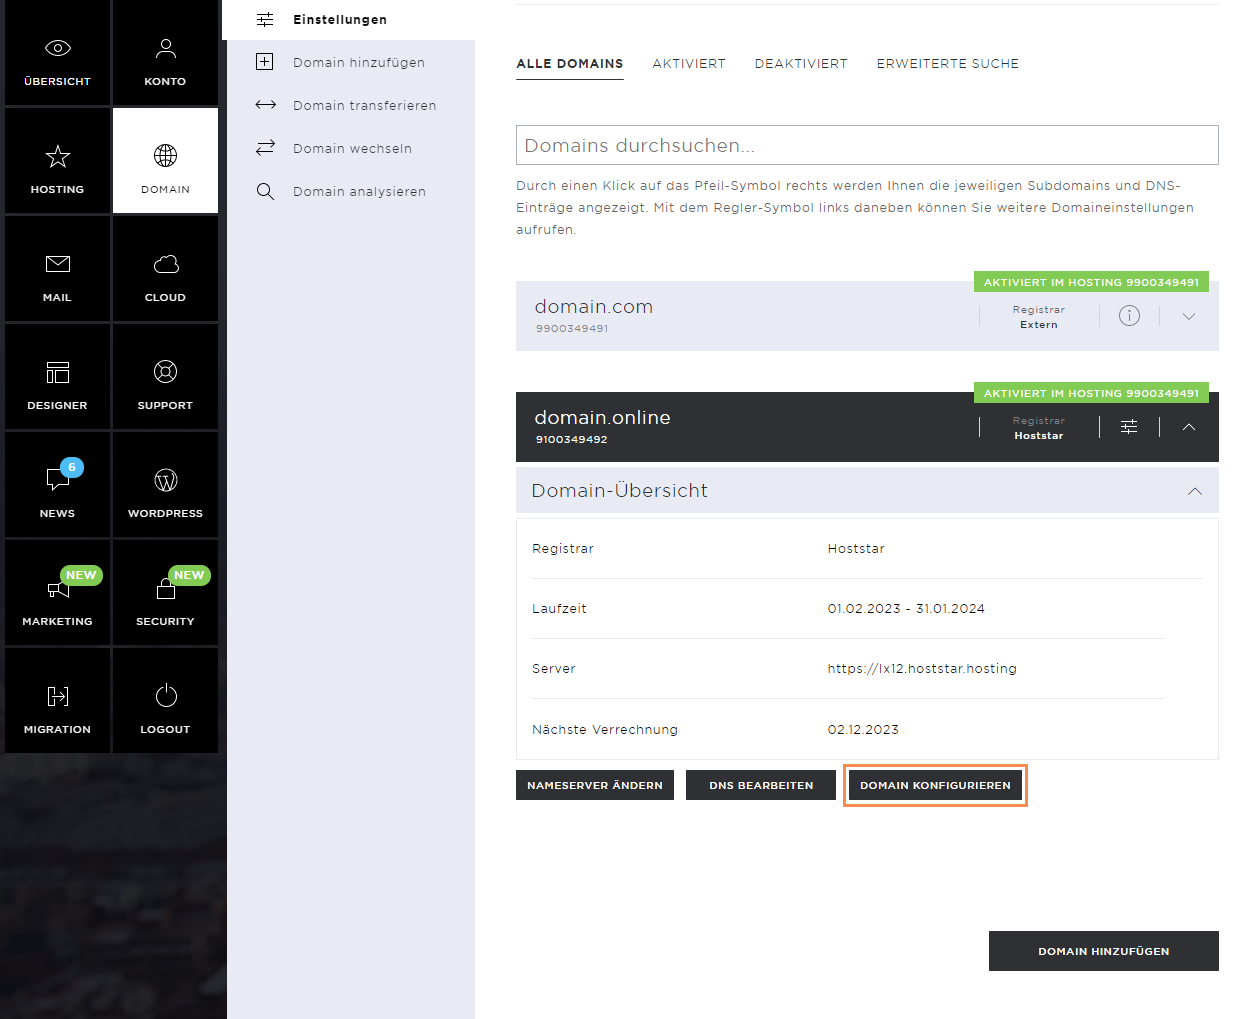
With the button Configure Domain, you can enable or disable individual domains with a hosting, should they no longer be required.
Select the subscription on which you want to enable the domain and confirm the selection. Please note that domains can only be used for the various hosting services if they are active.
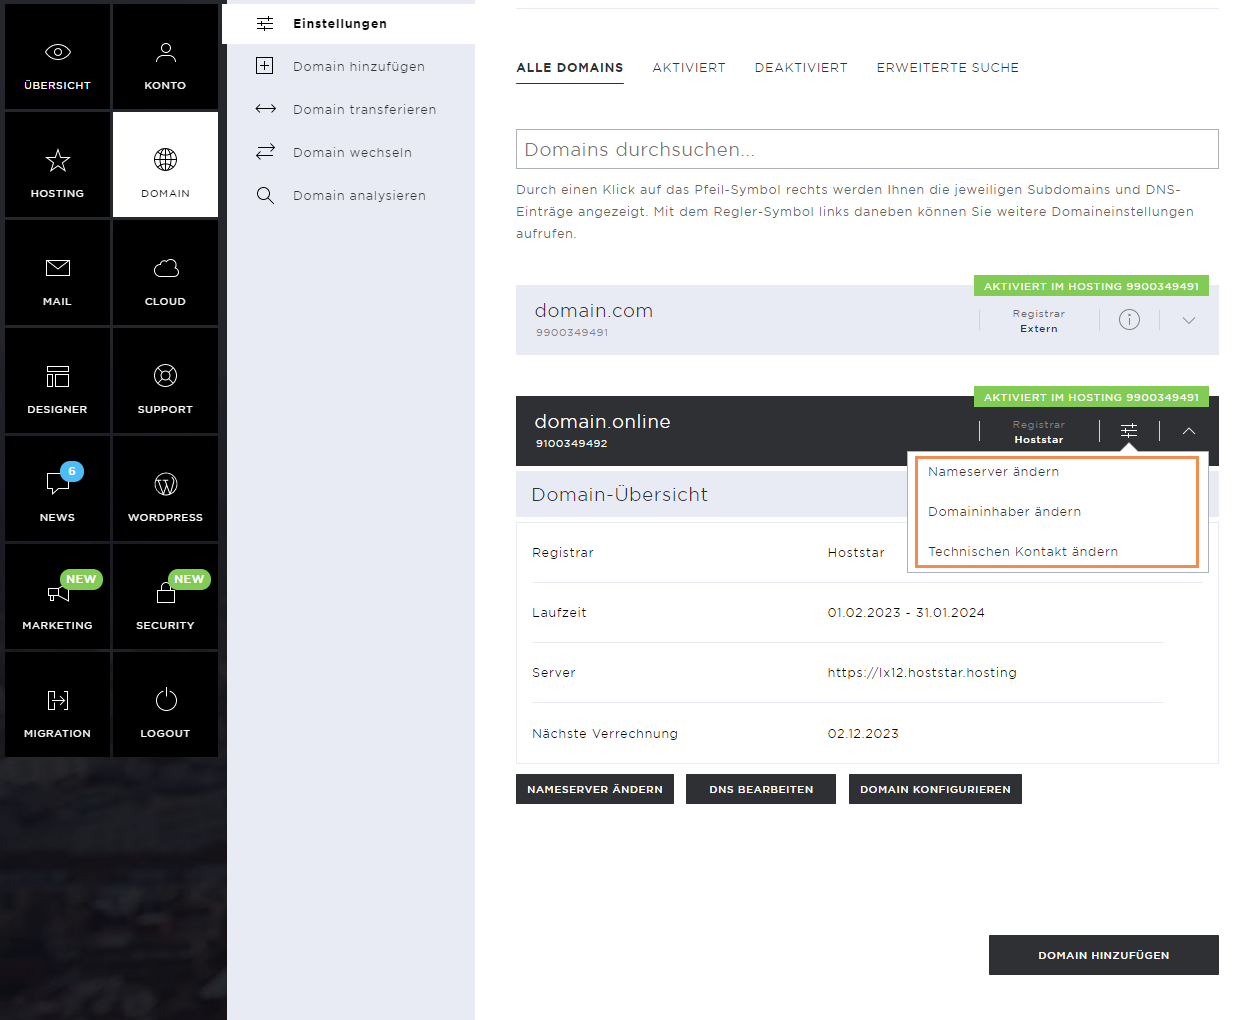
Change domain holder and technical contact
To change the domain holder, click the slider icon. In this menu, you can change the owner or the technical contact of the domain.
Fill out the online form and save the changes. These are automatically stored in the system.
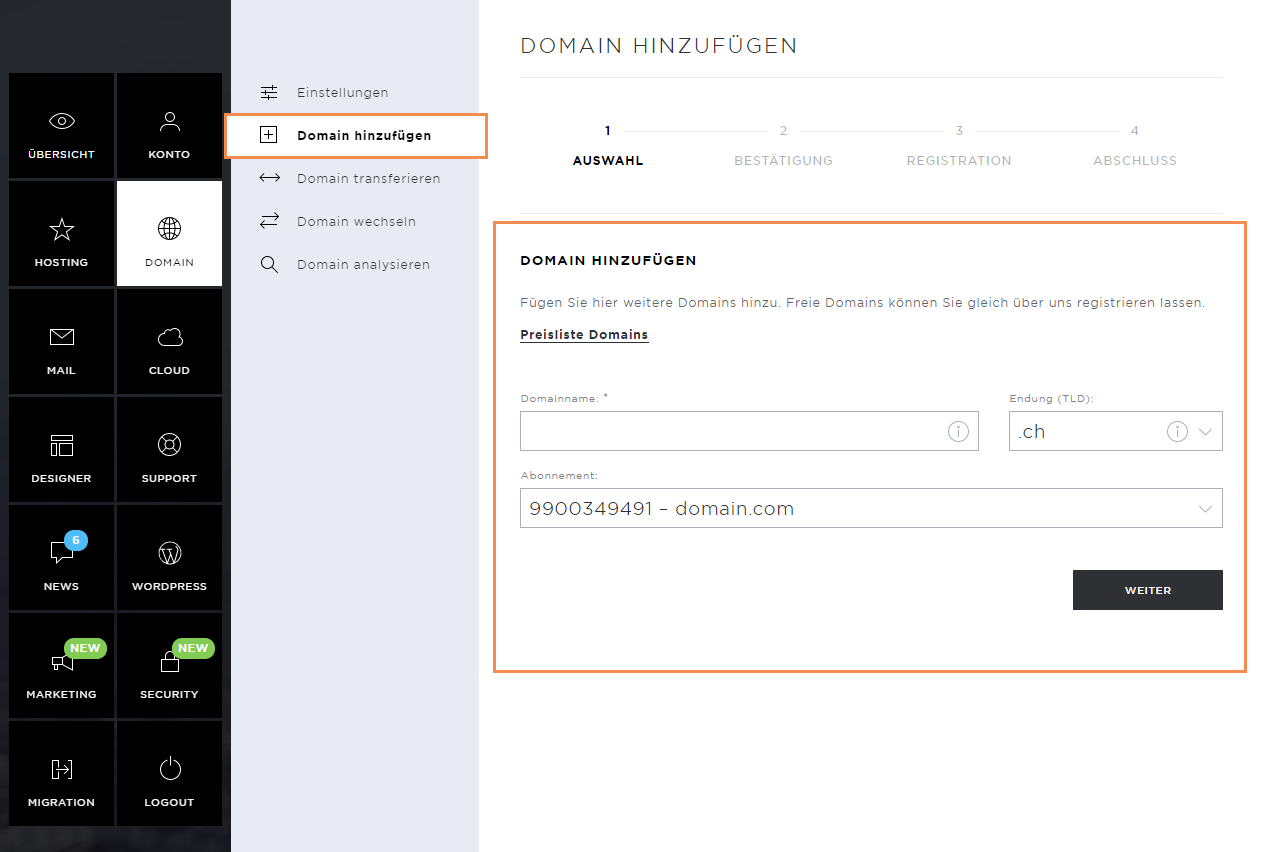
Add domain
If you want to add a domain, you can do this in the menu item Add Domain. Enter the desired domain name and extension and click on Next.
Follow the subsequent steps. At the end, you'll receive an invoice. As soon as this has been paid, the domain will be activated.
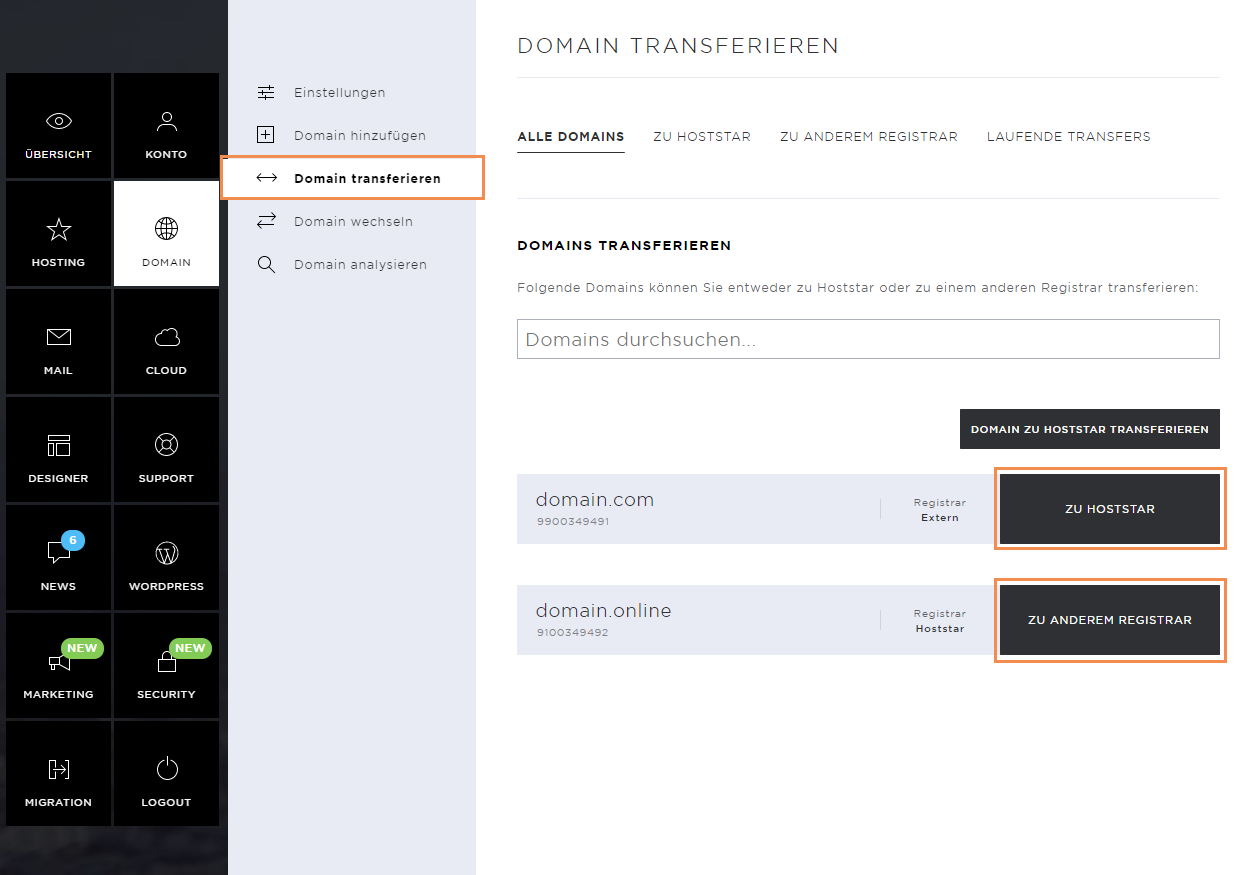
Transfer domain
To transfer domains from another provider to us, click on the menu item Transfer domain. Here you'll see a list of domains that you can transfer directly to Hoststar. If you want to transfer a domain, click on To Hoststar and continue with the subsequent steps in the process.
Domains can only be transferred if they have been approved for this purpose by the relevant registry. For each domain transfer, you'll receive a unique transfer ID, which you have to enter here.
Change domain
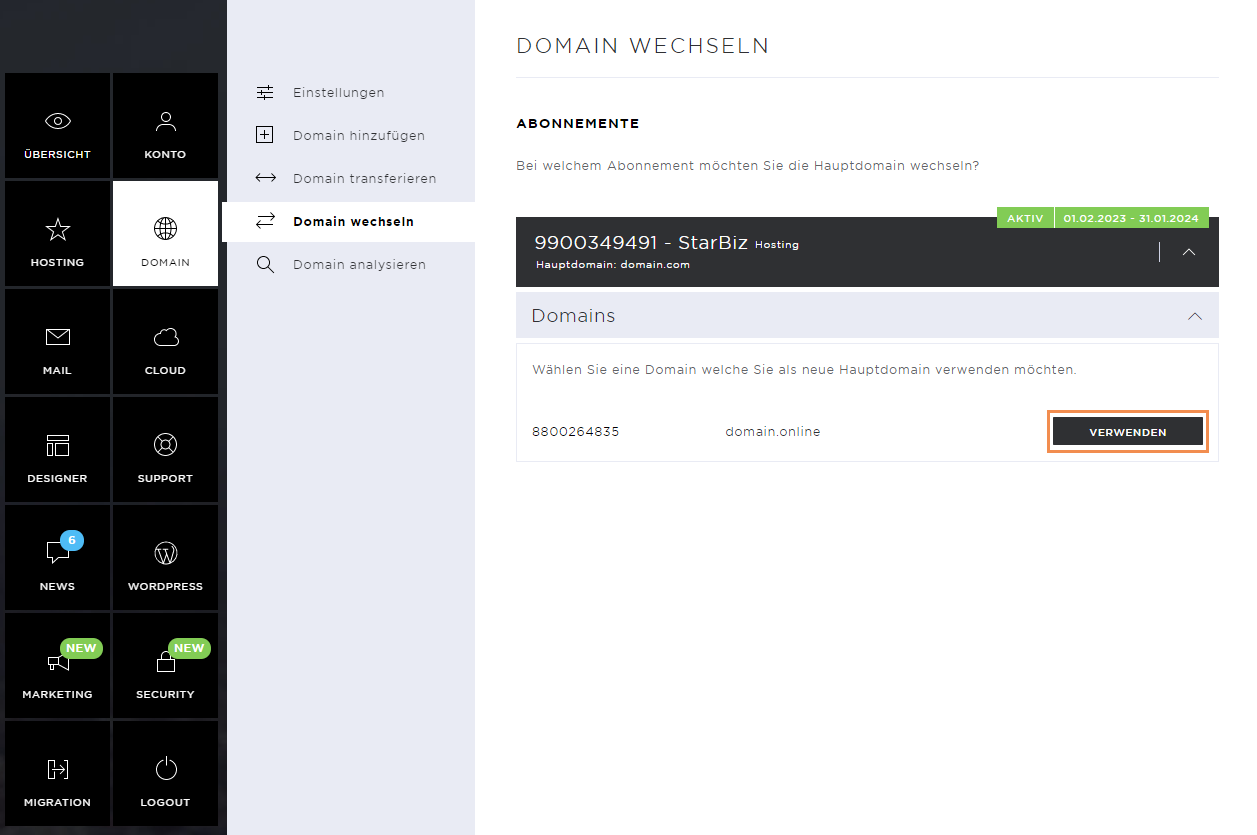
You can change the main domain of your hosting via the menu item Change domain.
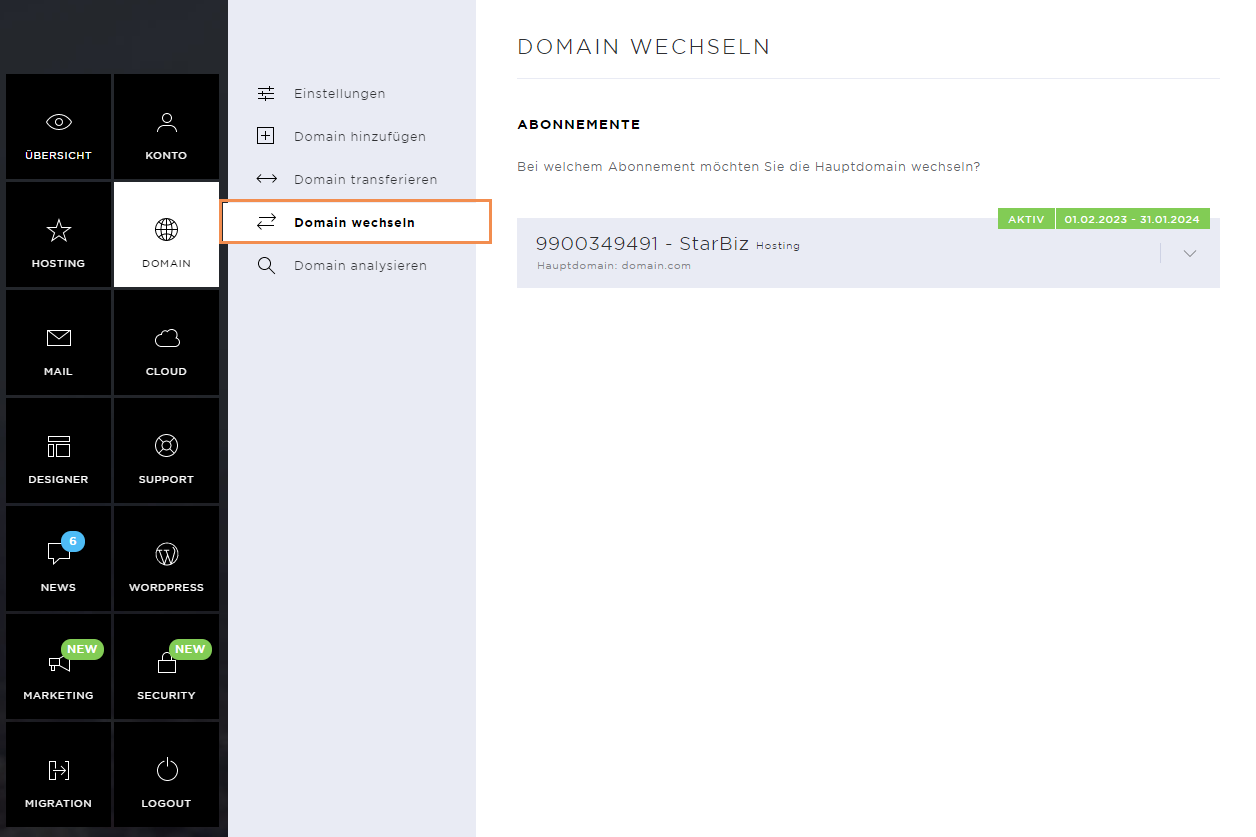
Under a domain of your choice, click the Use button and confirm the selection. Read the warning message carefully. This change will have an impact on the login details to the My Panel.
Analyse domain
Under Analyse domain, you can check which domain endings (TLDs) are still available for your domain name. To do this, click on Start domain analysis for the desired domain.
