Use Webmail
Hoststar Webmail is divided into several modules with the following options:
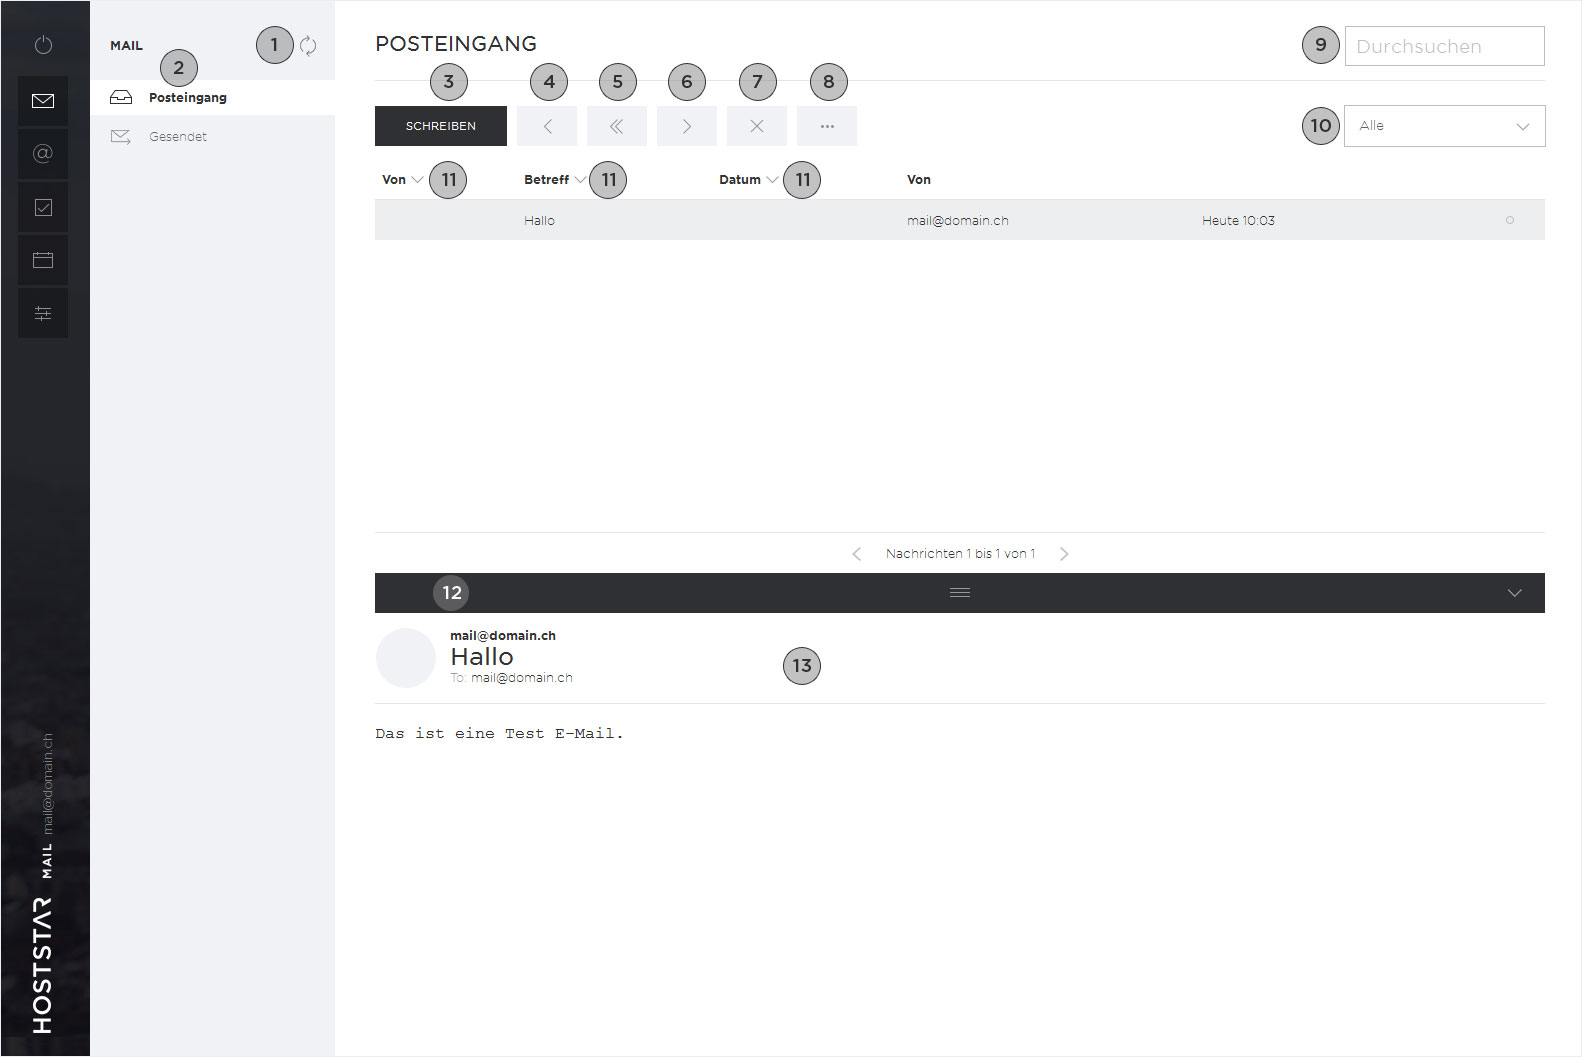
The «Mail» view contains the following items:
- Refreshes the content of the current folder.
- The folders in your email account.
- Compose new email.
- Reply to an email.
- Reply to all email recipients.
- Forward a message.
- Delete an email.
- Other functions including marking an email as «read/unread».
- Search emails in current folder.
- Filter emails in the current folder according to the desired criteria.
- Sort emails in the selected column, in ascending or descending order.
- Customizing the reading pane: Drag the black bar separating the reading pane upward or down to make it larger or smaller. If you click on the arrow icon at the right, the reading pane is resized to the default setting or is minimized.
- Reading pane: The content of the currently selected email is displayed here.
Click an email to select it. Selected emails are highlighted in grey.
To move an email to a different folder, drag and drop the message into the desired folder.
Address book
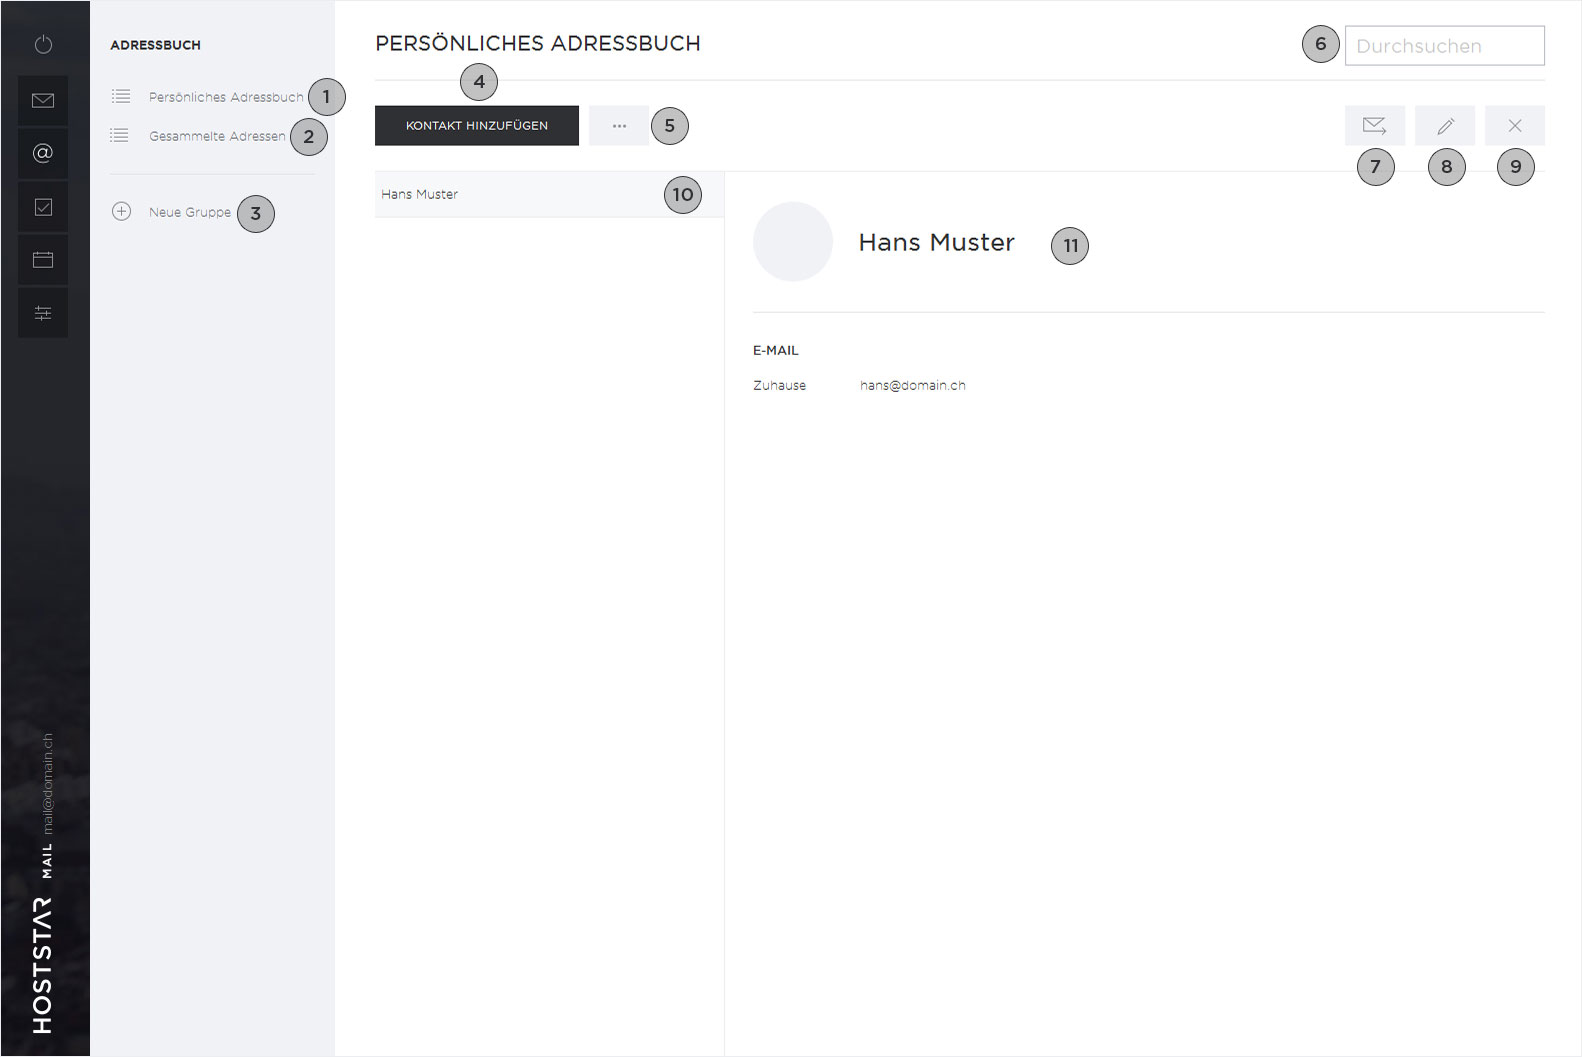
The «Address book» view includes the following:
- Default address book group of the email account.
- This address book group automatically collects email addresses from the emails you have sent and received.
- Create a new address book group, such as «Business» or «Personal».
- Add a new contact to the open address book group.
- You can import .vcf (vCard) or .csv files to create new contacts or export a selected contact as a .vcf file (vCard).
- Search for contacts in all address book groups.
- Compose an email to the selected contact.
- Edit the selected contact.
- Delete the selected contact.
- All contacts in the selected address book group. Click the contact to select it and show its details in the details pane at the right.
- Details of the selected contact.
Tasks
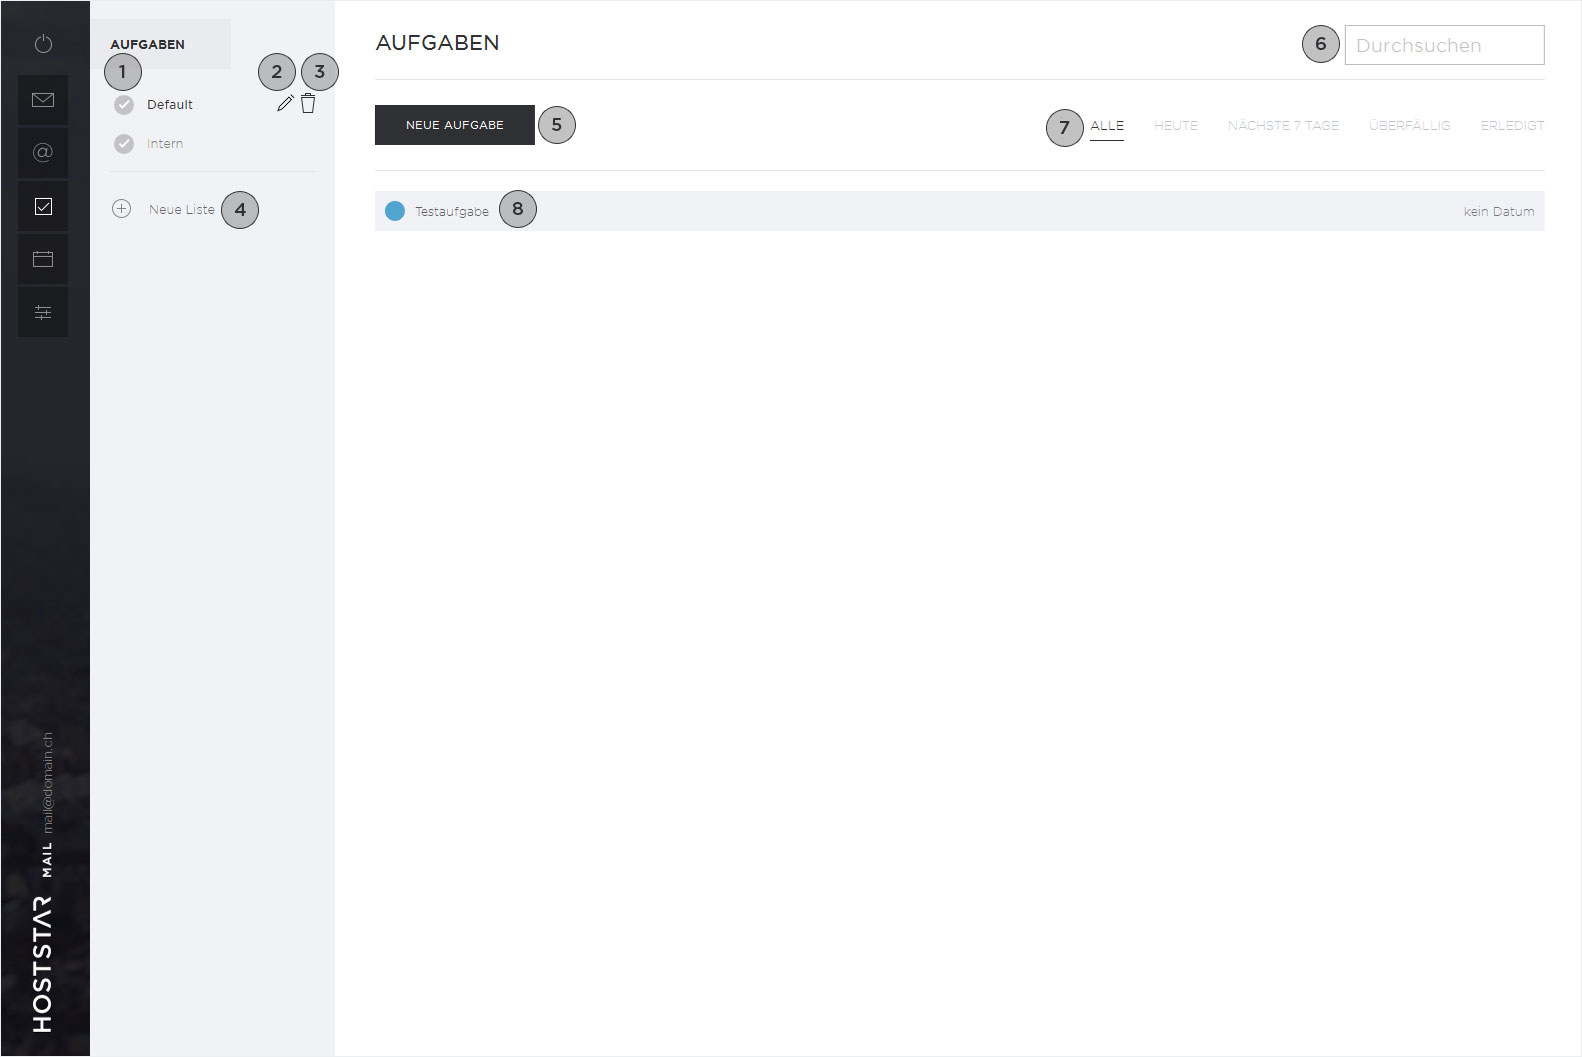
The «Task» view includes the following:
- Click the check mark symbol next to the appropriate task list to show/hide the tasks in this list. The tasks in the list are shown when the check mark symbol is displayed.
- Rename the selected task list.
- Delete the selected task list.
- Create a new task list. You can enter a name for the task list in the pop-up window that appears.
- Create and (if required) schedule a new task and add a reminder. You can assign the task to the relevant task list under «List».
- Search all task lists for a certain task.
- Filter tasks by the selected criterion.
- Click a task to toggle between «done» (crossed out) or «to do».
Calendar
The «Calendar» view contains the following:
- Click the arrow symbols to page through the months. Depending on the calendar view, click a day to show the selected day/week/month.
- Click the check mark symbol next to the appropriate calendar to show/hide the events from the list. Clicking the check mark symbol toggles between hiding/displaying the events on the list.
- Rename a calendar, change its colour or display/hide reminders.
- Delete a calendar. Warning! All of the calendar's events will be deleted permanently.
- Create a new calendar. You can enter a name for the calendar, select a colour and set the visibility of the reminders in the pop-up window that appears.
- Create a new event. In the calendar view, you also have the option to create events by selecting the desired time range.
- Optimised print view for the selected calendar view.
- Export the events of the selected calendar as an .ics file (iCalendar).
- Click the arrow symbols to page forward or backward a day/week/month depending on the currently selected calendar view.
- Select the desired calendar view (day/week/month/agenda). You will see the upcoming events in the «Agenda» view. You can also define how far in advance these events are displayed, and what increments to display.

Settings
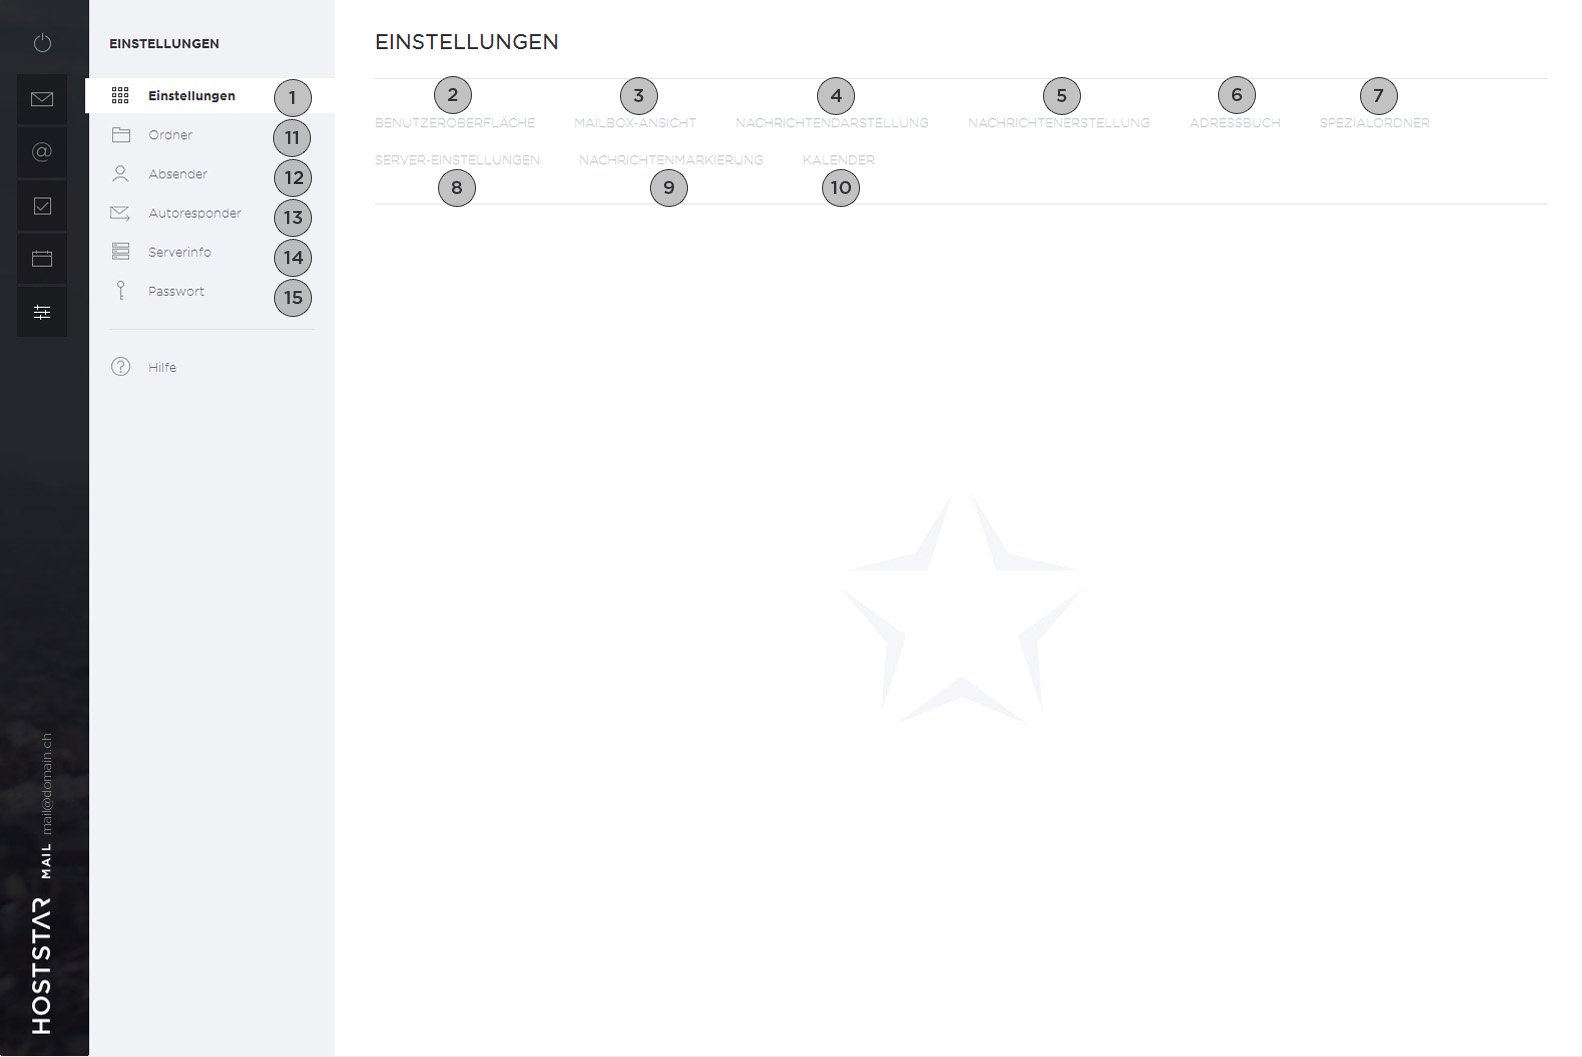
You will find the following options under «Settings»:
- Configure general Webmail settings.
- Language, date and time settings for Webmail.
- Settings for the message preview, listing of messages, etc.
- Message display settings. For example, you can choose whether to have messages open in a separate window and whether enable HTML display.
- Settings for composing new messages. For example, whether to include the signature when responding to emails, and the option to enable or disable the spell checker.
- Address book settings: for example, the number of entries displayed per page and whether to use automatically collected addresses.
- Assign specific folders these functions: drafts, sent, deleted and spam.
- Options for handling the deletion of emails.
- Select a colour that will be used to highlight emails meeting certain criteria.
- Calendar settings: for example, the first day of the week or colour of events.
- Create folders or change the properties of existing folders.
- Define a sender for the email account. These are email addresses which can be used as sender addresses for the email account. We recommend entering email aliases of the email address you are currently using so that you can also use these email addresses as the sender.
- Set up an autoresponder – for example, an automatic response when you are away. You can set a date range in addition to specifying the sender, subject and message text. You also have the option to create and change autoresponders in My Panel.
- Necessary server information for setting up the email address in an email program.
- Select a new password. For security reasons you need the current password in order to change a password for the email account.
Automatic Webmail login via My Panel
Adding a picture to a signature